
 |
 |
 |
 |
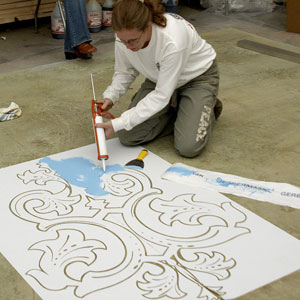
Because their artistry is computer-generated, stencils empower every contractor to create stunning works of art regardless of artistic talent. It is amazingly simple to produce logos, images, and artistic effects with exact detail. The concrete industry has an arsenal of magnificent images ready to order. Send a customer to user-friendly sites such as Modello Designs, Engrave-A-Crete, Royal Design Studio, Legacy Decorative Concrete Systems, or many others where they can find artwork for approval. Confirm the dimensions, and the stencils are a few mouse clicks away. You may offer them corporate logos or custom pieces of laser-cut, computer-generated stencils. Any vector image can be turned into a custom stencil. This means that you can order words, images and more.
If your designs allow creativity but do not require specific images or logos, off-the-shelf stencils from craft stores or specialty sites such as Royaldesignstudio.com or Engraveacrete.com offer quick solutions. By purchasing a variety of popular reusable stencils, you enable yourself to create artistic designs without the production time of ordering project-specific templates.
Reusable plastic templates — off-the-shelf or custom — available from craft stores or online are well-suited for use with buildable products such as microtoppings, gel resists, metal suspensions, acrylics, or with temporary markings for hand engraving.
 |
 |
 |
 |
 |
Use the stencils with rapid-dry dyes or water-based stains and an HVLP sprayer, and the work will be complete as quickly as you can spray. When using slow-drying products such as reactive stains with stencils, the concern is bleeding or wicking under the stencil design. To minimize the risk of wicking, purchase quality stencils, use very light stain applications, mix the stain with a gel to hold the stain in place, or apply a resist that dams the stains to block bleed.
Stencils for production engraving or sandblasting may be ordered from specialty producers such as Engrave-A-Crete. The gel resist, LesCoat, offers a blastable medium.
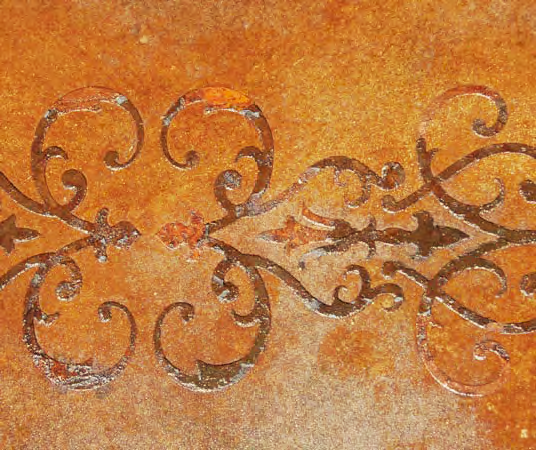
Fleur de lis
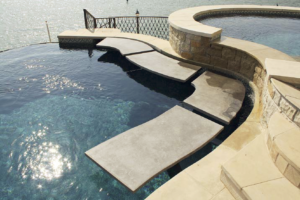
To accomplish the design shown in the photo, stain the concrete with an amber acid stain. Place the reusable stencil and apply the gel resist over the stencil. Lift the stencil immediately and allow the resist to dry. After the resist is dry, stain the concrete a dark brown/black. Clean the residue. Remove the resist to reveal the original color beneath the stenciled resist. Ta-dah! It doesn’t get any easier than that.
Microtoppings
When stenciling designs with microtopping, remember that the color of the microtopping factors in. You may simply apply a pigmented microtopping or play the microtopping color to factor into the final outcome. To create the first design (above left), a dark microtopping was applied over a light-colored floor.
In the second image, a combination of white and dark grey microtoppings were applied before the stain application. Where white microtopping was applied, the color is “rusty.” Where the applied microtopping was dark grey (for the actual design), the final color is a deep “rusty black.” Same stencil, different colors.
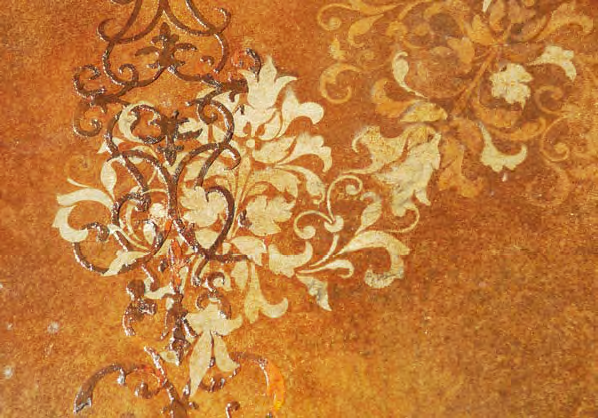
Foliage
In the foliage image, we stained the floor a light amber color. Then we applied the gel resist through a reusable stencil. After the resist dried, we stained the floor again with a slightly darker color. We allowed the color to develop and removed some of the gel resist, but not all of it. We stained the floor again. Then we removed all the gel, and the resulting pattern was a layered multitonal effect. It is really quite simple. Just think the process through before you begin.
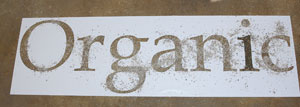
At right, we stained the concrete using reactive stains in various medium-to-dark tones. Then we placed the stencil and stained using lighter reactive stains like greens and ambers. As this image is the word “Organic,” we chose to scatter enhancing fertilizers to give the outcome a more organic look.