In the November/December issue of Concrete Decor, I discussed the types of penetrating treatments that are used to protect concrete countertops and other elements. The other divergent path to protection lies in topical coatings. There are more choices and considerations with coatings than there are with penetrating treatments, and I believe it’s because of this that so many people are confused, frustrated and bewildered. In this article, I will clear up coating confusion.
Unlike penetrating treatments, topical sealers rely on the coating’s properties to provide all of the protection. When the sealers are applied properly, the concrete is never exposed to stains or acid attack because nothing actually touches the concrete. The coating bears the brunt of wear, abrasion, heat, stains, chemical attack and other environmental hazards. And the coating gives the concrete creation its sheen, color depth, texture and appearance.
I’ve written in-depth articles on the differences in the chemistries available: acrylics, epoxies, urethanes, polyureas and so on. Rather than list chemistries and their behaviors, this time I’d like to take a more practical approach to selecting the right coating for the job. First, think about what the requirements are, and then select a coating that meets these requirements.
Then I’ll cover a few common issues to be aware of, so that you can prevent problems common to coatings.
Where to use topical sealers
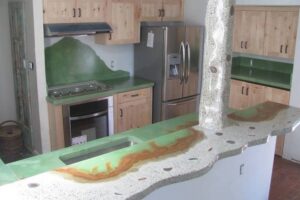
Kitchen countertops are by far the most demanding application for any sealer. Kitchen countertops are exposed to a multitude of staining agents, plus acids, oils, cleaners and water. Homeowners commonly abuse their countertops in a number of ways: cutting on them with knives, putting hot pots on them, dropping heavy objects such as cast iron skillets on them, dragging heavy pots across them, even standing on them to reach something in an upper cabinet. It’s no wonder that sealing concrete for kitchen countertops is a challenge.
Unfortunately there is no topical sealer that meets all of these challenges. Any topical coating can scratch, so you need to advise your clients not to cut on the countertops.
However, I don’t believe that this drawback warrants choosing a penetrating treatment over a coating in the kitchen. Many coatings have phenomenal stain and acid resistance, and this is the most important need in a kitchen. Most homeowners will accept not cutting on their countertops, but all homeowners are bound to spill some food on their countertops, no matter how fastidious they are.
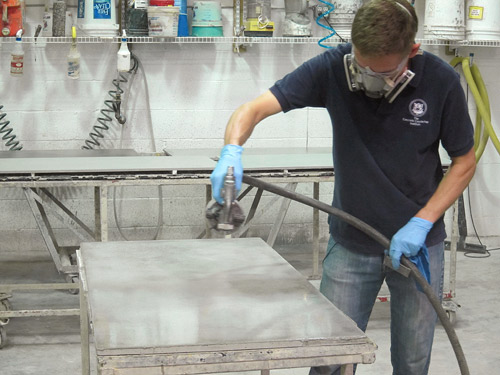
For kitchen countertops, I recommend a high-performance coating such as a urethane. Urethanes provide good scratch resistance and excellent resistance to stains and acid. When installed properly, they never need to be reapplied. However, urethanes do not bond well to concrete so they usually need an epoxy primer coat. Getting a perfect finish requires skill and practice, often requiring the use of an HVLP spray gun. Surface preparation is also extremely important, as with any coating, to prevent problems like delamination. I will delve more into surface preparation later.
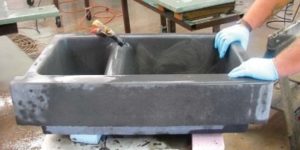
Concrete kitchen sinks present an even bigger challenge. They have all the issues of kitchen countertops, with the addition of the certainty of being subjected to concentrated and frequent impacts from heavy pans and dropped knives and other sharp utensils, as well as daily exposure to food, cleaners, and running and standing water. For these reasons, I do not recommend concrete kitchen sinks at all. I’ve always managed to talk clients out of them, but if you have a client who insists, make sure they sign a disclaimer about cracking and damage.
Bathroom countertops are almost as challenging as kitchen countertops. They are also subjected to many staining agents such as makeup, and even harsher chemicals than in the kitchen, such as nail polish remover. And bathrooms tend to have more intensive water issues, given the extra-humid environment. Generally acids are not a problem in bathrooms, however, so despite the chemicals and humidity, I relax my sealing requirements a bit for bathroom countertops and will even use a simple acrylic.
Acrylics are inexpensive and very easy to apply. Acrylics wear off, and the client will need to reapply an acrylic eventually, but this is relatively easy for them to do. Clients should be cautioned to wipe up makeup, toothpaste or any other staining agents immediately, as acrylics do not provide very good stain or acid resistance. If a stain does occur, I’ve found that the easiest way to remove it is to apply bleach. However, some sealers are damaged by bleach, so exercise caution.
Many concrete countertop makers apply wax over acrylics. I do not recommend this. Wax creates the need for much more frequent maintenance because it wears off so fast, and I don’t think the nice sheen it gives is worth the extra maintenance inflicted on the client.
Concrete bathroom sinks present a bigger challenge than bathroom countertops, because sinks are used frequently and are exposed to running and standing. Relative to concrete, water is mildly acidic, and long-term exposure to running water in bathroom sinks will erode away the relatively soft cement paste between the sand and aggregate. So for sinks, I recommend a high-performance coating such as a urethane or an epoxy. Not all urethanes are suitable for wet environments — I do not recommend UV-cured coatings for use with standing water or constantly wet environments, due to reported delamination issues related to water that got under the UV coating.
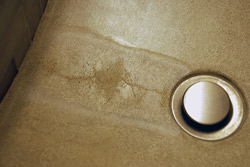
This brings me to concrete showers and tubs. This is the most water-intensive application of concrete (besides concrete fountains). I believe that these should be treated like bathroom sinks. Besides the sealers for the surface, the major issue with showers and tubs is waterproofing. While this subject is beyond the scope of this article, the
sealer used on the concrete should never be relied upon as the sole means of waterproofing, especially in the case of showers.
Many contractors think that the heat generated by fireplaces presents a challenge. Actually, the construction of fireplace surrounds, mantles and hearths compliant to building code ensures that the surrounding area is not too hot, and surface temperatures of materials within the combustible material zone are usually below 200 F. Any sealer would do fine with temperature low enough to not burn skin or boil water. (Only wax would be affected, since waxes have relatively low melting points.) All that said, since fireplaces generally have no staining or scratching issues, I actually don’t bother with a coating and just use a simple penetrating treatment such as a densifier.
Outdoor concrete creations such as tables, lounge chairs and outdoor kitchen countertops each have their own unique protection requirements. An outdoor kitchen countertop would be exposed to a lot more staining agents than a lounge chair. But they all share challenges that are not issues with indoor concrete: ultraviolet light exposure, thermal heating from sunlight, and freeze-thaw temperature changes (depending on climate). Rain and humidity can also be an issue with outdoor applications. The best thing to do with outdoor applications is to ask the sealer manufacturer whether the sealer can handle the conditions unique to your application and climate.
Some coatings definitely are not suitable. For example, epoxy yellows in UV light, so it cannot be used outdoors. The exception to this is an epoxy primer covered by a urethane coating that has UV blockers in it.
When to apply your sealer
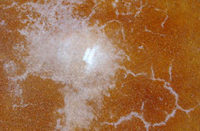
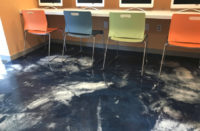
Many contractors are scared of coatings because they’ve heard horror stories about callbacks due to delamination. Assuming there is not a manufacturer defect, delamination never has to occur if you know how to prepare the surface and apply the coating correctly. There are several considerations when doing this.
Many coatings are very sensitive to any moisture in the concrete when they are applied. Applying most coatings to wet concrete would be a disaster. Unfortunately, it is hard to tell whether your concrete is really dry enough, especially if the coating manufacturer doesn’t provide guidance as to tolerable moisture levels for their product.
Do not confuse drying with curing. It is still essential to wet-cure your concrete for a certain amount of time for it to develop strength. Only once the concrete is cured to the desired strength should you start the drying process.
Temperature affects drying rates. Colder temperatures slow evaporation rates, so estimating dryness levels based only on time can pose problems if your shop temperatures are low.
Temperature also affects how fast and how well the coating dries or cures. Many sealers have minimum temperature limits that you must comply with.
The right surface texture
Hone only to 200 grit when preparing concrete for a coating.
It is a waste of time to polish concrete to which you plan to apply a coating.
Coatings will not adhere to a super-smooth surface such as polished concrete. There is not enough “tooth” in the surface for the coating to grab onto. Plus the coating itself will provide the feel of a finished surface, not the concrete. Coatings will also not adhere to a surface that is dusty, dirty or oily. Even the oil from your skin can affect the bond between coating and concrete. Before applying a coating, wipe the surface with acetone using a clean, lint-free cloth, and do not touch it again.
Application methods
There are many application methods for applying coatings: wipe-on, roll, spray. Regardless of your application method, it is extremely important to follow the manufacturer’s instructions exactly and to practice, especially with more challenging methods such as spraying.
The manufacturer’s instructions may involve measuring and mixing components. If so, measure carefully using accurate tools such as graduated cylinders. The instructions may involve mixing components and then waiting a certain amount of time for the components to begin reacting. This is called induction. Use a stopwatch or timer to ensure you wait exactly the amount of time specified. The instructions may involve waiting a certain amount of time between coats and then doing some sort of surface prep like scuffing with a 220-grit sanding pad. Don’t get impatient and recoat too quickly without proper preparation.
Most of the problems I’ve seen with coatings have been due to not understanding or not adhering to the manufacturer’s instructions. Improper surface preparation is a close second.
Another common cause of problems is jumping to the latest “sealer du jour” that everybody is talking about on discussion forums when you’ve been using a sealer for years that you and your clients are happy with. Moving to a new sealer usually entails a much steeper learning curve than most people realize, and the time required is often not a good business investment. Unless there is a compelling business reason to change, such as client dissatisfaction with your current sealer, stick with what works for you and your clients.
By following instructions, practicing, selecting the right coating for the job, and sticking with what works, you will be able to give your clients high-quality and high-performance work that keeps them happy for years to come.
