Hopefully, you are like me, in that I receive great enjoyment out of what I do for a living. My job is to help business owners be successful, and I especially brighten up when I have the opportunity to incorporate color into the equation. In 1996, when RetroPlate first combined the process of densifying with the process of diamond grinding and polishing, the sole purpose was to eliminate dusting and spalling in industrial settings. Today, with the advent of colors, polished concrete is as much a design element as a functional one.
Evolution of color and concrete
Color and concrete have evolved during the past decade, but especially within the past year. In the early years, when one talked about adding color in conjunction with polishing, first it was integral colors or dry shake hardeners, then acid stains crept to the forefront as it became viable to combine densifying and acid stains. What a relief, acid stain without a topical sealer to apply … and re-apply. It’s true that acid stains brought their own perceived limitations: Either you liked mottling or didn’t, and you had to be a fan of earthen colors.
How many times has a customer asked why the whole 10,000-square-foot floor doesn’t match the 1-square-foot sample? And customers would see a brightly dyed floor of primary colors and couldn’t understand why you couldn’t provide those colors in conjunction with polishing. It didn’t matter how many times you explained the difference between an acid stain that both penetrated and chemically reacted with the slab, and a topical dye that “sat up on the surface.” It was frustrating. Now for the past year, with the advent of solvent-based dyes, we too can produce primary colors with polishing — and without topical sealers.
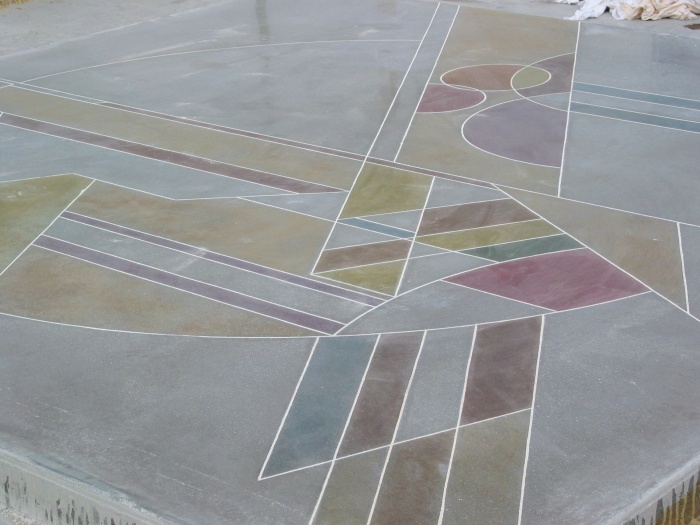
Acid stains and solvent-based dyes each have their own distinct personalities. The final appearance can be similar, but you have to travel different paths to get there. Not only do they succeed for different reasons, but they also have to be treated differently with a polished floor than with a floor that will only be cleaned and topically sealed. Let’s evaluate the differences, the similarities and the safety requirements for both processes.
Appearance
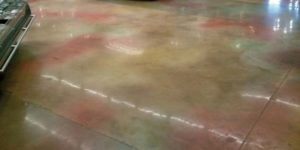
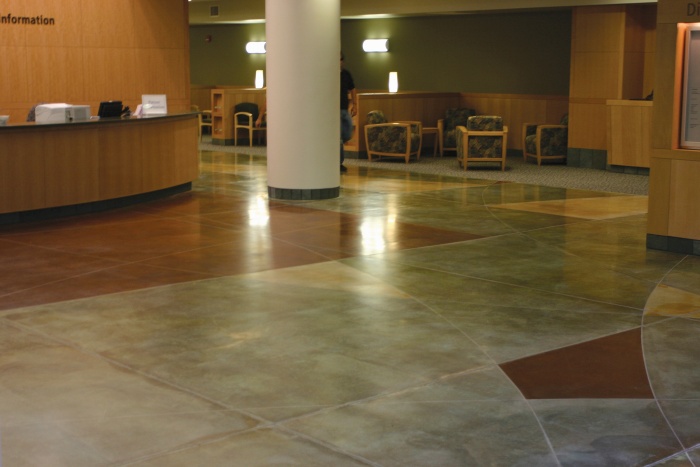
Acid stains generally deliver a mottled, variegated appearance similar to marble. This effect occurs when the metallic salts within an acid stain react with the calcium hydroxide created within the slab.
In polished concrete, the richness of the stain is somewhat muted when compared to a “classic” application that is directly on the cement-rich cream and covered with a topical sealer. In addition, anytime that you dilute an acid stain with water, you will not only lighten the color, but you will also increase the variegation. This occurs because you have altered the percentage of acid to liquid, and with the acid being responsible for opening up the surface to allow penetration of the metallic salts, you have decreased the opportunity for this reaction to occur.
To lighten an acid stain on polished concrete, first make a “dilution solution” of approximately nine parts water to one part muriatic acid, and then dilute the acid stain with that mixture. By doing this you maintain the level of acid in your mixture. Should you end up with lighter, bare areas use the stain has not taken, you can generally utilize the solvent-based dyes to fix and blend these areas. In addition, the more you grind a floor, exposing more aggregate and decreasing the cream, your final appearance will be lighter and more monolithic.
Solvent-based dyes
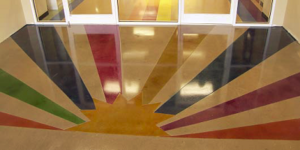
Solvent-based dyes have brought a whole new richness to the concrete polisher’s palette. In the past, the earth-tone colors of acid stains were the only means by which you could add color following the pour, and if done properly, not worry about color walk-off or deterioration. But now the rainbow is an option. Solvent-based dyes, as opposed to acid stains, are formulated to carry the color into the slab through the use of acetone. The size and characteristics of the dye formulations’ molecular structure is small enough to be driven below the surface as the acetone “flashes.”
By nature, the appearance of the dyes will be monolithic, but through practice, if you wish, you can learn how to mimic an acid stain’s marbling. You can also plan ahead and use both dyes and acid stains on the same project to achieve different looks that one alone cannot do. Please note that while I have successfully applied dyes over acid stains, I have found that the reverse does not always work, as the dye components can act as a barrier to the acid stain.
Application/timing
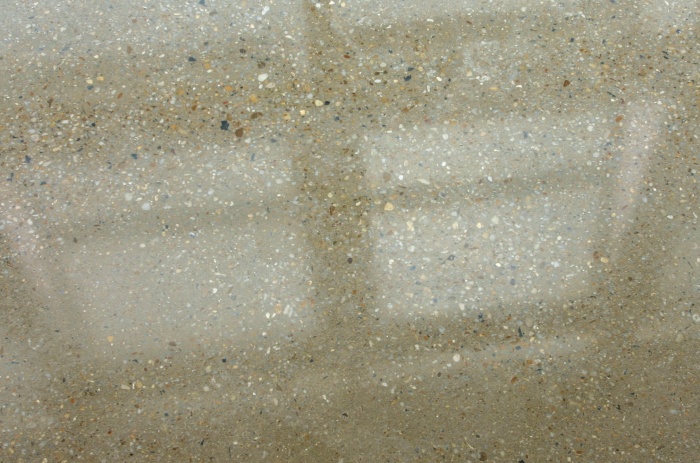
Though acid stains and solvent-based dyes can be applied in similar fashion to polished concrete, there are important differences between them. As with any application, the most important rule to follow, regardless of which product you are using, is to be consistent. Whatever steps you take for the approved sample MUST be followed for the actual project application.
The method that you use will be influenced by both the size and type of project. In large, wide-open areas, acid stains will usually be applied with a pump sprayer. It is imperative that the parts are plastic, especially the tip. A brass tip will slowly be eaten by the acid, and without notice, will go from a fan pattern to a stream. In smaller areas, or for graphics, you may use brushes, rollers or sponges. Always test an area ahead of time to establish how the acid stain and floor react. Each color and manufacturer’s product will differ, both in the chemical reactivity and in the final color achieved. Should the floor be highly reactive, you can dampen the floor with water first to help buffer and control the reaction. At all costs, you want to minimize any linear patterns caused by application or brush marks.
In addition, the timing of your application will alter the final appearance. I personally like to apply the acid stain after my 400 grind, and prior to the application of the RetroPlate. In this manner I believe that you achieve both good penetration and reactivity. You will also benefit from having all of the grinding steps out of the way. Following the proper densification, you can then polish with higher grits while not compromising your colors. Should you choose to apply the acid stain following the densification, you will receive a lighter, more monolithic appearance.
A note from the author
Manufacturer’s recommendations for number of applications and “set-time” are based on topically protected applications that have been applied to a cement-rich surface. Introducing diamond grinding to the mix alters the requirements and timing of applications. Always do a test, but I recommend that two applications be applied, with the first being allowed to sit overnight, and the second for several hours. There is no need to remove the residue from the first application prior to making the second. While I stated that it was imperative to use plastic tips with acid stains, it is generally recommended to use brass tips for solvent-based dyes. Depending on the plastic compound for some tips, the acetone does to plastic what the acid does to brass. Airless sprayers are also an option with dyes, while they are not with acid stains.
Introduction of graphics
The solvent-based dyes open up a whole new world of graphic possibilities for applicators and their customers. In doing so, they also raise different questions as to application. I will address this further under safety. However, please note you must extinguish all open flame prior to application of the solvent-based dyes.
The most common carrier for solvent-based dyes is acetone. Due to the almost instantaneous flashing of the acetone, the dye is driven into the surface of the slab. It is this reaction that allows a solvent-based dye to work with polishing, but to date has not produced a water-based dye that works. You can alter the depth and degree of color through changing the ratio of acetone to dye mixture. A product such as Colormaker’s Decographic (www.colormakerfloors.com) dyes icomes in liquid form. It is then further diluted with acetone on the project site. American Decorative Concrete Supply ships the AmeriPolish dyes in dry, powdered form. Customers then mix them with acetone on the project site three hours prior to use.
In applying the to polished concrete dyes it is important to know that several light applications will achieve deeper penetration than one heavy application. Additionally, one must wait at least 15 minutes between applications, otherwise the acetone in the second or third application will destabilize the dyes from the first application. The timing of the application and results are similar to that of the acid stain. You can apply dyes following the densification, but the resulting color will be lighter.
One major advantage of dyes over acid stain is that you eliminate nearly one day of downtime.
Safety, shipping and handling
Always wear protective gloves, clothing and respirators for either product. Protect the adjacent finishes and floor area that you do not wish to receive stain or dye. Maintain your equipment to help ensure proper application and minimize health hazards due to equipment failure.
Acid stains are not combustible, but can cause burn damage to your skin, lungs and eyes at the very least. The majority of the acid stains that ship in liquid form have HAZMAT regulations assigned. This is important to know, not just from the handling of the product, but also from the shipping restrictions. It is very expensive to pay for these products to ship via air, and shipping carriers limit quantities significantly. Plan ahead and work with your distributors.
Solvent-based dyes bring their own cautionary tales. As the acetone flashes, the vapors disperse very quickly into the air. This can create a potential fire hazard that can ignite instantaneously. It is imperative that you extinguish all open flames, that all sub-contractors are aware, and you maintain proper airflow.
As with acid stains, the liquid dyes must meet the same HAZMAT standards. However, most carriers allow dry powdered dyes to ship without these restrictions.
