If you’re new to making concrete countertops, you may have encountered any of a number of pesky problems. Even experienced concrete countertop artisans encounter a problem now and then, but they will also tell you that practice makes perfect.
The countertop experts have worked for many years to hone their techniques, which are now so second nature that basic challenges of the medium are no longer much of an issue. Thankfully, for the most part, these experts are willing to share insights into the process of creating concrete countertops.
Across the board, the experts point out that it is important to first look at the process as a whole, rather than individual steps, because all parts of the process are ultimately related. For example, the physical site of installation will dictate the size and shape of precast countertop sections if the sections need to be transported up several flights of narrow stairs and through narrow doorways; so, in essence, the end affects the beginning.
Here’s a look at some of the more common issues related to concrete countertops, and tips from the experts for avoiding problems.
Molds and mix design for concrete countertops
The majority of concrete countertop artisans I talked to do not cast in place, primarily because they have greater control in their own studios. Of course, by precasting the countertops, transportation and installation then become major parts of the equation. Nonetheless, whether you precast or cast in place, mold making and mix design are very important.
Many experienced concrete countertop makers use different mix designs for different projects. Steve Rosenblatt, marketing director at Sonoma Cast Stone Corp. in Petaluma, Calif., says, “We use one of our 23 batch mixes based upon the application of each project. This is far more scientific than the countertops we made four or five years ago, and vastly superior to the original tops we made 12 years ago.”
Rosenblatt reports that mold-making and reinforcement are also much more involved than in years past. “We use stainless steel, rubber, fiberglass, melamine and mild steel for molds, depending upon application and the number of pieces to be cast.”

In Burbank, Calif., David Cunningham, owner of David Jack Corp., advises thinking through the mold making. “If you’re doing a thick slab, more than 3 inches, use stronger materials or use external bracing. Most people use melamine — we do — but if there’s a chance of bowing I use a piece of angle iron.”
Michael Karmody, principal of Stone Soup Concrete in Florence, Mass., points out that the most dangerous time in the making of concrete countertops is when you de-mold. “The concrete is young and weak. It is not yet of this world.”
After de-molding, it is very important to keep the slab sealed on all sides to prevent curling, Karmody says. In his shop, they “get slabs up on bunks as soon as possible to equalize the amount of air and moisture around the entire countertop.” With curl, he says, 1/8-inch will settle, but ¼-inch is too much. You need to “train your eye to see ‘level,'” he explains.
Shrinkage cracks in concrete countertops
Fu-Tung Cheng, principal designer with Cheng Design in Berkeley, Calif., says, “If it ain’t cracked, it ain’t concrete.” Who hasn’t heard that old adage? But it’s true, and Cheng and others agree that cracks in concrete countertops occur for a variety of reasons.
| “What? Another shrinkage crack?” |
Buddy Rhodes, of Buddy Rhodes Studio in San Francisco, says shrinkage cracks occur because there is too much water in the mix, the slabs are left in the molds too long, or when the top of the slab dries faster than the bottom (which also results in curling).
Thankfully, hairline cracks should not pose structural problems. Jeff Girard, founder of the Concrete Countertop Institute in Raleigh, N.C., reports, “Hairline cracks don’t compromise the integrity of a properly reinforced countertop, and the only significant impact usually is a minor aesthetic change.” Often, he says, hairline cracks are considered inherent characteristics of the material, and not a flaw.
If you wind up with hairline cracks, you can deal with them creatively.
“One of the tricks I have learned is to grind off a little  powder from the bottom of the slab to get a very fine dust,” Rhodes explains. “This dust should be the same color as the top of the slab. Mix this dust with a bonder and work it into the crack. Most times the color match is so good the crack blends in.”
Cracks may also be caused by the reinforcement used in the slab, Cheng says. To avoid cracks, he makes mix design and reinforcement decisions based on each job. For example, in thin slabs, too-large rebar can cause cracks. In these applications, he suggests, you might want to investigate using thinner reinforcement or a mesh.
C-GRID, a carbon-fiber epoxy grid reinforcement, is strong, lightweight, non-corrosive, and provides exceptional crack control, according to John Carson, director of development for manufacturer TechFab LLC. Due to its high tensile strength, he adds, it can also assist with faster mold stripping and less cracking problems due to transportation and rough handling.
Pin holes in concrete countertops
Let’s face it, some people are just picky about holes in countertops. Well, your countertops don’t have to have holes. Proper vibration and finishing tricks can eliminate them.
|
“Darn…
Those Bug Holes”
|
According to Cheng, the two most obvious questions to ask if you getting pinholes are: How dry is the mix? Does vibration work the air out? If your mix tends to be too dry, adding more water isn’t the right fix, he says. “If pinholes are your problem, change your mix to use a little more plasticizer. It’s okay to let the mix wet out to five or six slump. With plasticizers, you can even push the slump to seven or eight and still get a strong mix.”
As for vibration, “Use a vibrating table instead of a manual vibrator. That way you’re not relying on the influence of the thing you’re dragging through the mud. You’re shaking the whole world.”
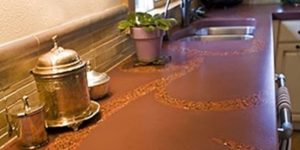
Rhodes says water reducers and super plasticizers can help by making a mix more pourable, and a vibrating casting table also helps, but he has found a way to use pin holes as part of the design. “To fix them we make up a colored concrete slurry/paste and back-fill the bug holes. I developed my ‘pressed’ look to be able to control those pesky little holes. We fill the veins with three or more colors and polish it smooth to put out a very clean product.”
The grout used to fill pin holes can be as simple as a pigmented cement paste, but Girard reports more sophisticated grouts contain admixtures, polymer additives, metakaolin and very fine mineral fillers to minimize shrinkage and aid in working the paste into the small holes. With these products it is difficult but possible to fill even the smallest pinhole, he says. “Diligent efforts and effective grouting practices can virtually eliminate all surface pinholes.”
 Color in concrete countertops
Many concrete countertop makers want consistent color throughout the countertop, so integral color is often chosen. But the degree of consistency is affected by what kind of integral color you use.
“Some people like liquid colors or colors in suspension because they make a very uniform, even product,” Cheng observes. “Others like subtle variation that takes place with powdered forms because it looks less like a machined product.”
Maintaining consistent color from section to section and across pours is another matter. Cheng and others agree that you must be exacting to retain consistent color across pours. If your proportions are off by a shovelful, or if you use a little more water, or if you wait longer to pour — any and all of these things can affect the color.
Careful and accurate weighing and dosing of all ingredients, especially the mix water, is critical, Girard says. “‘Eyeballing’ mix-water addition, especially without any way of knowing the exact amount of water added, is the No. 1 reason color inconsistency occurs,” he points out.

Changes in ingredients from one batch to another, such as different cement brands, different colored aggregates or different pigment brands, also will ensure the final color of one batch doesn’t match another, Girard says.
Using plastic sheeting during the curing process can result in uneven color if condensation accumulates and pools on the surface. There are alternative methods, including misting with spray bottles, using curing blankets or tenting the plastic so condensation drains away from the surface.
Depending on the color you want, integral color may not be sufficient. You may need to use topical staining, too, but remember it is not a replacement for integral color. And it may be difficult to apply if your countertop has elevations and intricate detailing.
“Expediency isn’t the idea, craftsmanship is,” Cheng cautions.
Transportation and installation of concrete countertops
“It seems that every architect and designer would like you to make monolithic slabs. They would like you to cast it as big and long as possible and then put a large sink hole in there. That looks great on paper but you have to be able to transport them,” says Rhodes.
| “How are we going to get this countertop up those stairs and through that doorway?” |
Remember all the measuring and strategizing of the installation you did weeks ago? This is when it all pays off. When you reconnoitered the site, did you think about how you would move around? How many people you would need? Did you double-check all the templates? “Every mistake is days and days of hassling and adjusting and maneuvering,” Cheng says. “Take an extra day [up front] to get it right. Don’t rush to save an hour and lose four days later.”
One trick Rhodes uses is to make a template with 1/8-inch plywood and a glue gun on site. “That way we can figure in our seaming and access to the job site. If we can back up the truck and just roll it off onto the cabinet we will make the slabs larger than when we are walking it up a couple of flights of stairs.”
Concrete slabs are strongest when they are oriented vertically. So, says Girard, concrete countertop slabs should be transported and handled vertically, exactly as plate glass is transported and handled. “Slabs should be packed on a strong, rigid frame (like an A-frame), leaning against the frame to prevent the slab from falling over on its own. The slabs should be set on padding and separated from each other by soft, non-abrasive padding such as moving blankets.” And be sure to strap, clamp or tie the slabs securely for the ride.
For short distances, blanket wraps often suffice. For  long distance transportation, think crates. After all, you are handling fine artwork.
But transporting pre-cast concrete countertops is more than a packaging problem; it is heavy lifting. For some, it makes sense to hire movers for those big jobs.
Rhodes says his studio has learned to make countertops look thicker than they really are to cut down on the weight, by making slabs 1 ½-inch thick with a return on the finished edge to look 3 inches thick.
Seams in concrete countertops
“There is a feeling that seams are an ugly thing. We think they are an opportunity to make a transition,” observes Karmody. Very often the choices are automatic, he says, but each client can have a lot of control picking up architectural details, bias cut, back bevel, curves, and such. “There’s always an opportunity to add a design element,” he says.
| “Why can’t I get my seams to match up?” |
Steve Eyler, owner/operator of Eycon in Myersville, Md., says it is impossible to make joints go away, but he avoids potential seam problems by making them as sharp and straight as possible. He also uses colored caulk that is designed for stone countertops and color-coded to match the top.

Girard recommends that seams be filled with a resilient material, not a hard epoxy, so that they act as control joints. He also suggests leaving a tube of caulk and instructions to reduce callbacks.
Problems with seams can stem from many different causes. “Seaming problems can be caused by uncorrected and improperly installed cabinets, uneven slab thicknesses, poor or no slab shimming, and poor templating and slab-forming techniques,” Girard explains. And don’t forget the undersides of the slabs, he adds. “It is essential that the undersides of slabs be flat and fairly smooth so that the slabs sit flat on properly installed cabinetry.”
Sealing and waxing concrete countertops
“Sealers have always been the bane of this industry. For years we have been told that there is no perfect sealer and that all concrete will stain,” Rosenblatt says. But, through trial and error, the experts have found their preferences. Rosenblatt and many other concrete countertop experts use penetrating sealers.
Wax provides a sacrificial shield for concrete countertops, but it is not favored by all. Karmody reports that wax that is not buffed out can look uneven. And it offers only temporary protection. When his shop recommends a wax schedule for clients, he finds most of them don’t follow it. Eyler doesn’t recommend the use of waxes precisely because it introduces a maintenance issue that may not be necessary. “If the sealer you seal your counter with can cut it on its own, don’t use [wax].”Nonetheless, Girard points out different sealers provide different performance characteristics, and problems arise when a sealer’s performance characteristics don’t match up with a client’s expectations. In addition, he says, sealer problems can arise from improper surface preparation, application or material selection. “Just as with concrete floors, proper surface preparation is essential.”

Often, problems with concrete countertops can be avoided long before the template measuring begins. As Rosenblatt explains, communication with the client — spending extra hours fully understanding the client’s exact needs — pays off in many ways. “We pay special attention to consistent colors and to making sure that the client understands seams, faucet preparations, supporting structure, delivery and installation problems long before they become a problem,” he says.
With concrete countertops, practice makes perfect. Make enough of them and you’ll find the little problems disappear, but you may find you encounter a whole different set of challenges.
Says Eyler: “The hardest thing I deal with now is design; creating something different that people find unique as well as functional.” Moving beyond the technical to the artistry — what a nice place to be.


