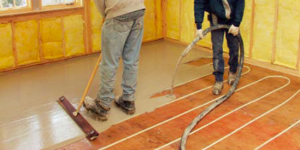
Putting radiant heat into unusual concrete masses including walls and ceilings as a solution to hearing interior spaces as well as exterior concrete surfaces.

Bob “Hot Rod” Rohr isn’t your everyday installer of heating systems. The Rogersville, Mo., heating expert got turned on to radiant heat about 15 years ago and dove, well, toes-first into the technology. He now specializes in radiant heat and — as an important side interest — loves to challenge himself by putting radiant heat into unusual concrete masses.
Of course, he installs the heat form in concrete floors, where most folks would expect to feel the warmth that radiant heat delivers. He’s also applied radiant in walls and ceiling spaces, chiefly as a solution to heating interior spaces when he can’t get enough BTUs out of the floor.
Then, several years ago, a strange thing happened. On a cold winter day, he was driving past a nearby concrete lawn ornament business when the idea occurred to him: Why couldn’t these concrete forms also be radiantly heated? So he approached the business with the idea and was soon delivering radiant tubing to be pressed into the mold of a large dog, a German wire-haired terrier, which quickly became the world’s first concrete hot dog!

At the next meeting of the Radiant Panel Association, Hot Rod lugged his newly created radiant dog onto the show floor. The 40-inch tall concrete version of man’s best friend — which Hot Rod named “Aqualung” — appeared in brown, black and white, weighing in at a mere 420 pounds. Show attendees loved it. When connected to a homeowner’s hydronic (hot water heating) system, the sculptural whimsy, which he’ll make to order, warms towels outside a bathtub or makes coats toasty warm inside an entryway.
The dog’s trade-show popularity quickly led to a heated Venus statue, which required a considerably larger and more challenging heat system. She was shipped to New Hampshire where, for three years, she’s dutifully warmed bathroom towels and washcloths.
However, many of Hot Rod’s concrete masses are more pragmatic. A few years ago, he installed about two miles of radiant heat tubing in an all-concrete home in Springfield, Mo. The 3,800-square-foot home had 18-inch walls. Some of these were heated. The floors, stairways and a small pond sculpted into a massive back deck, all in concrete, were also tubed for radiant heat.
Concrete countertops have become one of Hot Rod’s favorite surfaces to heat. In his own home, he and a friend, Tom Ehlers, who owns Springfield-based Stone Effects, installed radiant tubing in bathroom countertops and a tub surround before the concrete was formed, stamped and dyed.
“Now my wife, Ellen, lingers in the bathroom, and the cats also bask in favorite radiantly heated spots, so that walking from room to room is like a slalom course. I’m not sure it’s a good thing, but the people and critters seem to be pretty happy with it,” says Hot Rod.
Even though Hot Rod learned early on that heat moves to cold (it doesn’t rise), he was surprised to find that washcloths and towels, stored on a shelf below the radiantly heated countertop, are toasty warm all winter long. “My next big project at the house is one we’ve avoided for years: a total remodel of the kitchen with, of course, artfully sculpted, radiantly heated concrete countertops.”
Why it’s warm
Indoors, radiant floor heating works by using water-filled tubes or electric heating elements to warm the mass of a floor. The surface of the floor then gently emits energy that moves easily to all the objects in the room, making them — and your customer’s feet — cozy warm.
“Radiant heat from a floor will warm everything in a building, giving every surface an inviting sensation that can be felt,” says Dan Chiles, vice president of marketing for Watts Radiant Inc. “The floor becomes the warmest surface in a room, not the coldest.” Surprisingly, those surfaces most uncomfortable without radiant heat — concrete, stone and tile — become the most comfortable with radiant because they transfer the heat so well.

Whether hydronic or electric, radiant floor heat costs less to operate than other forms of heat. Because radiant floors offer more comfort at lower thermostat settings, most people find that they’re comfortable at lower room temperatures.
A system is the sum of its parts
Hydronic (water-based) radiant floor systems are used in larger areas or for an entire home or building. Generally, hot-water radiant is best suited for spaces of 500 square feet or more, or where hot water is already used as a heat source. Hydronic tubing can be embedded in concrete slabs, in thin slabs over frame floors, stapled up between floor joists, or installed on top of the subfloor.
An electric system may be the best choice for small areas like a master bathroom. Of course, if electric energy is locally affordable, it could be used to heat or provide floor warming to an entire home or business.
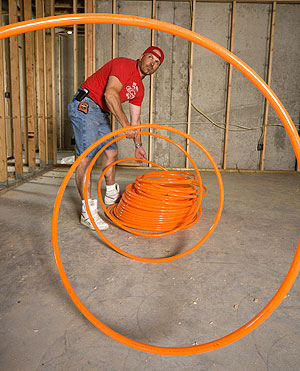
PEX (Cross-Linked Polyethylene) tubing can be used for radiant heat and snow-melting applications. Some care must be taken to protect it from job-site puncture, crushing or exposure to the sun’s light. Another candidate is Watts Radiant’s “Onix,” EPDM (Ethylene Propylene Diene Monomer) tubing that is more resistant to job-site abuse and UV radiation.

Special distribution units, called manifolds, channel the heated liquid into multiple radiant floor pipe circuits. Manifolds are usually located close to the heated area, although they can be installed in a mechanical room. Each manifold set includes a supply (hot) and a return (cooler) manifold. Manifolds usually include balancing valves to control the flow of heated water to each circuit, or loop. Circuits are the loops of PEX or EPDM tubing that begin at the supply manifold and end at the return manifold. The combination of manifolds and circuits heat a defined area that’s called a zone. A zone can be one room or several rooms.
All this and snow melting too?
While considering, or recommending, a radiant heat system, look at the floor plan carefully to see if there might be a door, a sidewalk or a garage entrance that faces north or is exposed to ice and snow buildup. The home or building owner should be encouraged to ask the radiant designer to add one or more snow-melting zones onto the heating system.
 This entails moving a solution of heated water and antifreeze from a heat exchanger attached to a space-heating boiler or dedicated heat source underground to cold surfaces outside. The user can activate snow-melting zones when the weather report calls for freezing precipitation, or simply wait for the microprocessor control to do the job.
For a snow-melt system, the designer specifies tubing embedded in outdoor or garage slabs. The designer must consider local weather, insulation, pipe spacing, pipe diameter and circuit length. PEX or EPDM synthetic rubber radiant tubing should have at least two inches of concrete over the top of the tubing. Usually, building codes provide exact measurements for this.
Snow-melting has several benefits. Icy surfaces are no longer a concern and are maintenance-free. Facility maintenance costs are reduced because ice-melting chemicals aren’t required. These chemicals kill landscaping, increase building cleanup as they are tracked inside, and can degrade concrete and asphalt.

And in today’s litigious society, the cost of a snow-melt system is more than returned with one avoided lawsuit.
These systems are well suited to commercial applications — especially critical areas like hospital and senior-housing entry areas, helicopter pads and delivery ramps. They can also complement an artfully stained or stamped decorative concrete surface. Why shouldn’t your craftsmanship be admired year-round?
Typically, most of the components of a snow-melting system, especially the heating plant, sensors and controls, are installed by a plumbing and mechanical contractor. But concrete contractors should be involved when it’s time to embed the heating elements in the slab.
In most cases, tubing is spaced from 6 to 12 inches on center and circulates a solution that has been heated 110 to 140 degrees Fahrenheit. Tube spacing is varied according to the degree of snow-melting required.
Tubing is usually strapped or tied to rebar or rewire. Even if rewire is not needed for structural reasons, it is needed to keep the tubing from floating to the surface of the concrete during the pour. A minimum of 2 to 3 inches of covering must be maintained over the top of the tubing. Tubing can also be clipped to rewire, hooked to a base material with turf hooks, stapled into rigid insulation, or otherwise connected to a compacted base.

At expansion joints, where slab movement could cause stress, it’s necessary to take special precautions. “We recommend slipping the tubing through collars cut from plastic pipe or pipe insulation and placed several inches below the expansion joint,” explains Whitworth. “Another key precaution is that the system must be pressure-tested before and during the concrete pour to ensure that no damage has been done to the heating elements during installation.”
Where to get started? It’s always best to involve the talents of a professional installer who knows and has experience with radiant heat, preferably a member of the Radiant Panel Association. You can then choose, with confidence, to what extent you’d be involved in the process.
John Vastyan is president of Common Ground, Uncommon Communications, based in Manheim, Penn. He specializes in communications for the radiant heat, hydronics, geothermal, plumbing and mechanical and HVAC industries while serving business-to-business manufacturers and trade associations.


