1. Make the switch to steel casting tables
A lot of surface defects can be traced back to the form surface. Minor blemishes in melamine can lead to major problems during processing, such as areas that are slightly retarded. What happens is that the concrete gains access to the sugars in the wood through a pin hole in the surface of the melamine. The sugars act as a retarder and prevent the concrete from setting up, leading to a surface blemish.
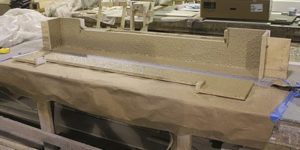
A 5-by-10-foot steel casting table can be set up for under $1,000, including a ridged steel base ($200 for a 3/16-inch sheet). You can use twister pads on a floor buffer to polish the steel to 1,500 grit, then seal with one coat of Trinic SB Sealer. (Editor’s note: Mark is a partner in Trinic LLC.) Cured pieces can be slid around with your pinky.
“Hot-rolled plate” is what most steel sellers carry. You can identify it by the black coating on it. The coating on it is rust that has been deposited at high temperatures. Cold-rolled steel is brighter with a slight oil coating on it to prevent rust. Hot-rolled plate costs less, but the grain is not as tight and therefore more visible. You may also notice roller marks if you look closely.
Cold-rolled steel starts out as hot strip which is run through an acid pickling bath to remove the black rust coating, then rolled. Cold-rolled plate has a denser and tighter grain structure with a shiny finish. It is lightly oiled to help stop rust. It costs more than hot rolled and may be harder to source.
The answer for a caster seems to be hot-rolled on a budget or cold-rolled if you require the slightly better finish.
2. Caulk with clay
I admit that I was a silicone caulk holdout, and I never achieved what I would call perfect edges. Clay caulk from an extruder will bring your edges to the next level. With silicone caulk, the clock starts ticking as soon as the caulk hits the open air. Get it perfect or you’ll end up with a mess. You also have to wait for the silicone to cure before you can cast, something that always bothered me.
3. Use carnauba wax as your mold release
I have yet to find form release oil that works as well at eliminating bugholes as wax does. Wipe on the wax, immediately wipe off the excess, let it dry, then buff it with a cotton cloth. Make sure to use a furniture-grade carnauba. The automotive grades have petroleum distillates in them and may cause bugholes. Be sure to wax right over the clay caulk. TreWax Paste Wax is one brand we recommend. I’ve also used Butcher’s Paste Wax.
4. Smooth your bottoms and round over your bottom edges
Feel is just as important as looks in our business. I’ve seen customers recoil in horror when they touch a sharp edge. You can wet the bottom of GFRC pieces to aid in finishing. Another option is to hit them with 50 grit before stripping.
Bottom edges can be rounded over with 50-grit hand pads followed by 100, just enough to take the sharpness off.
5. Tighten your seams
I realize that concrete is not CNC-cut to perfection, but it is possible to have nice tight seams that don’t draw attention to themselves. One option is to match-cast your pieces. Separate pieces by a thin strip of metal during casting. The pieces have to fit in the field. A very tight radius where two pieces meet is a must. You can also back-cut each piece slightly so the bottom edges never hit and stop the top edges from coming together.
6. Make GFRSCC
SCC stands for self-consolidating concrete. GFRC stands for glass-fiber reinforced concrete. Add the two together and you have a time- and labor-saving method for producing concrete surfaces.
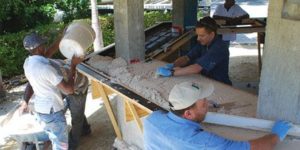
One thing that has never made sense to me is all the hand placement and rolling folks were doing when applying GFRC back coats. Why not design a mix flowable enough to not require hand placement and dense enough to not require compaction? Trinic has developed mix designs and additives to do just that. Strength tests of this method equal or in many cases exceed hand-placed and rolled GFRC made the conventional way.

Another technique I’ve developed is to cast a self-consolidating GFRC mix with no face coat and slightly vibrate the mix to lift the fibers off the face. The reason this works is that the specific gravity of glass fibers is less than cement and sand, causing them to lift off the face very slightly during vibration.
7. Consider CSA additives for faster turnarounds
CSA stands for calcium sulfoaluminate cement. It offers quick setting time, high strength, tiny expansion and low shrinkage. Before you get too excited, know that it’s brownish grey in color. Plus, it’s very hard to control when used as a 100 percent portland cement replacement. I prefer to use it as a 25 percent portland replacement. You can offset the color with titanium white, and the working and set times become much more controllable.
We’ve developed self-consolidating GFRC mixes with added CSA that can be cast in 4-foot by 8-foot-by-5/8-inch sheets, strippable a few hours after casting. They are perfect for shower walls, large-format tile, wainscoting, building panels and more.
You can turn your little shop into a big shop if you can get the projects you’re working on out the door sooner.


