The steps you take with your wet-cast or GFRC countertops prior to sealing them will affect sealer success more than the actual application of the sealer. It’s important to gain an understanding of what your concrete is doing, or more importantly, what you are doing with your concrete. All of these are important things to consider when preparing your concrete countertops for topical sealers.
Concrete does what you want it to do very predictably. Once you understand this fact, you’re on your way to successfully sealing your countertops.
Understanding curing and drying
To make quality concrete you need enough water to hydrate the cement. All excess water is used to gain fluidity. Excess water not needed for hydration (or that wasn’t used for hydration if you didn’t cure your concrete properly) will eventually exit the slab through evaporation.
When you place a piece of foam on day-old concrete you end up with a dark spot under the foam. The trapped escaping moisture darkened the concrete. This is why you should not seal your concrete the day after casting. The escaping moisture may compromise the sealer. Time is not the best judgment of when you can seal, moisture transmission is.
Here are a few tips for lowering your concrete’s vapor transmission rate sooner:
- Start with a quality concrete mix with a low water-to-cement ratio. Wet-cast 10,000-psi concrete is fairly easy to make. GFRC should have a very dense, almost water-repellant surface when designed and cast properly. (I offer mix-design software that makes this process painless.)
- Accelerate the curing of your concrete with heat. You can equal the seven-day strength of concrete cured at 70 degrees in one day when you heat your concrete to 120 degrees for 16 hours (using portland type I cement.)
- Moist-cure your concrete properly prior to allowing it to dry. Curing and drying are two different things. During the curing process you must maintain the concrete in a moist environment to assure there is adequate moisture available for hydration. During the drying process you are allowing excess moisture to exit the slab. What seems like a dichotomy is also a matter of timing. Cure your concrete long enough for adequate hydration to occur, and dry it long enough for excess moisture to escape.
- Allow extra time for drying when you acid stain.
- Take the elements into consideration: If your shop is 50 F your concrete’s curing and drying rate will almost come to a halt.
Preparing your surface for sealing
Another important aspect to consider is the preparation of your surface. You may be needlessly overworking yourself and your concrete, or worse, you may be causing sealer failure due to improperly preparing your surface.
- Fill all the pinholes completely. I’ve developed a method for power-filling pinholes that I teach in class.
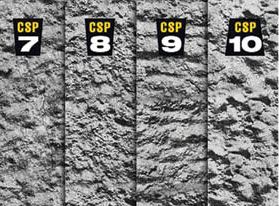
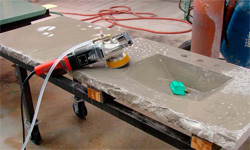
- Don’t polish to more than 200 grit. Following this step gives the sealer a mechanical as well as a chemical bond with the countertop. You’ll also be saving a lot of time and money by stopping at 200 grit.
- Profile the surfaces of unground pieces and GFRC pieces prior to sealing. I use a 10-to-1 muriatic acid wash to lightly etch and clean the surface, followed by a 10-to-1 ammonia wash to neutralize.
- Clean any wax, oil, or any other contaminates off the countertop surface, and clean prior to sealing.
- By exercising some control over your process you can expect to have quality predictable results with your sealer.
A Process for Curing and Drying Countertops
Day one: Cast, heat overnight to 120 degrees for 16 hours
Day two: Strip, initial polish, slurry
Day three: Final polish
Days four and five: Days of rest for the tops in a room with low humidity and an ambient temperature of at least 70 F.
Day six: OK to seal — in general. (See next two steps)
Add two to three days for acid-stained concrete.
Add more time for unheated concrete, a high-humidity environment or lower ambient temperatures.
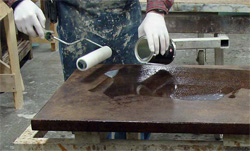
I built a climate- and dust-controlled room for sealer application to gain more control over the process.

