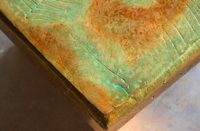
How much of a gambler are you? When you’re considering applying an overlay over an existing overlay, most experts will tell you not to do it — the risk is too great.
The fact is, unless you’re the contractor who applied the existing overlay, “you’re banking on what the guy in front of you did,” says Marshall Hoskins, senior technical representative at Specialty Concrete Products Inc. “It’s a roll of the dice.”
Seth Pevarnik, manager of technical service at Ardex Engineered Cements Inc., agrees. There are three major areas of concern, he says. You may not know what the existing overlay product is. You don’t know if it was mixed correctly. And you don’t know if the substrate preparation was done correctly.
Even if you do a test area, you can’t be 100 percent certain your overlay will work over the existing one. Why? “What works in a small area may not work in a large area,” Pevarnik points out.
Overlay manufacturers don’t want to assume the risk either. As Scott Wyatt, director of technical services at Floric Polytech Inc., explains, “When you’re doing overlays, the first thing a manufacturer will tell you is to rip up what was there. They don’t want to guarantee that their product will adhere to someone else’s.”
With those cautionary caveats acknowledged up front, there may be times when you’re asked to apply an overlay over an existing one. Can it be done? Of course. But you need to limit your risk and liability.
Making the decision
From a practicality standpoint, deciding to apply an overlay over an overlay often comes down to a few factors: cost, time, the condition of the existing overlay, and what kind of overlay you’re planning to apply on top.
If the existing overlay is a thin-mil overlayment, such as a microtopping or pigmented epoxy, then removal to get back to the original uncontaminated substrate can be fairly easy and efficient, says Trevor Foster, regional sales manager and principal trainer at Miracote Products. “This will ease the mind of the contractor/manufacturer that they are in direct bond with the original substrate, and they will sleep easier at night.”
Scott Thome, director of product services at L.M. Scofield Co., says one of the key questions to ask when deciding to apply a new overlay over an old one is why the overlay is being covered. Is it for aesthetic reasons or because there are problems? “If it is only to change the look and it is performing well, then placing new over old is an acceptable option. However, if the old overlay is cracked or has a weak surface, then removal would be the better option.”
Material compatibility is critical. Hoskins points out that different overlays have different characteristics related to flexural strength, compressive strength and bonding strength. “You need to make sure the characteristics [of the old and new overlays] are compatible,” he emphasizes.
For example, don’t put a high-psi overlay on top of one that is softer. You’ll get cracks. Another compatibility issue, says Thome, is expansion and contraction with temperature change. For example, high-modulus materials tend to expand and contract very quickly. Low-modulus materials react more slowly. “If you place a low-mod material over a high-mod in an environment that will exhibit fast temperature swings, there could be delamination occurring between the two.”
The way a product cures also might be an issue. Pevarnik says he wouldn’t put a self-leveler over a microtopping because of the way self-levelers cure. “It can cause tensile-strength stress as it cures, pulling the microtopping.”
Considering surface texture, Foster reports the easiest overlays to go over are thin-mil overlays, because they are typically semismooth or smooth. For the same reason, he says, self-leveling overlays are good to go over. Stamped overlays, on the other hand, are the least cost-effective to go over because of the amount of prep work involved to smooth them out.
Thome also observes that major pre-filling, such as of grout joints, can be problematic. “Most topping materials require a surface profile no greater than plus or minus 1/8 inch. If there are deeper areas than that, the material will cure slower in the deep areas and cracking or discoloration could occur.”
Don’t skimp on prep work
If applying a new overlay over an existing overlay is the chosen option after ensuring compatibility of materials, the next critical step is surface preparation.
Following the manufacturer’s recommendations for surface preparation is the best advice. “Over an existing overlay material, 99 percent of the time it will include some type of mechanical prep,” Thome observes.
Sanding, grinding or shot blasting will leave behind a surface with strong adhesive properties. “You want to mechanically abrade the surface to create some profile,” Foster says.
A clean, sealer-free, contaminant-free surface is also imperative.
“The number-one most important thing when putting one overlay over another is to completely remove any sealer on the existing surface,” Wyatt says. “Any sealer remaining on the surface will be a bond breaker.”
The importance of proper priming cannot be emphasized enough. Many experts recommend epoxy primers, but different situations call for specific primers. Consult your manufacturer and use what is recommended.
Brian Vicari, owner and CEO of The Concrete Colorist Inc., says it all comes down to the prep work. “If you rush the steps and apply over an old sealer you can get delamination. If you didn’t prime properly, the old overlay can suck moisture out of the new overlay, drying it out too fast or creating pinholes.”
The overall objective is to ensure a good chemical bond and a good mechanical bond between the overlays. Talk to the experts and just about all will agree that 99 percent of all issues arise from poor prep work.
Other details worth consideration
If you’re familiar with concrete, you know about joints. Many of the same joint issues apply when applying one overlay over another.
You can try to hide old functioning joints in the new overlay by incorporating them into the surface design. “Any joint in the existing overlay that’s a functioning joint — expansion, isolation, construction or control — must be honored, or they will show through the new overlay,” Pevarnik says.
On the other hand, decorative joints in the existing overlay probably will not show through the new overlay, depending on what was used to grout the decorative joints. Cementitious grout is typically not a problem, but Pevarnik says elastomeric or flexible joint material could telegraph or cause a hairline crack in the new overlay.
How many overlays can you layer on top of another? Perhaps the sky is the limit if everything is done properly. From a practicality standpoint, however, there are several considerations, such as door thresholds, floor vents and the like.
Foster also suggests weight may be a factor. “If applied over and over to a wood substrate, you need to look at weight requirements, too. Four or five overlayments might stress the wood joists and wood beneath the overlays.”
For Hoskins, the bond is the critical issue at every layer. With potential delamination possible at each layer, he says, the fewer number of layers the better. “The more layers you have, the more critical areas you have.”
Other considerations include if the work is being done in an interior setting, where you have a controlled environment, or outdoors. Traffic load may also be an important issue to figure in.
If you accept a project to apply an overlay over an existing overlay, be sure to do all you can to protect yourself from liability — especially if you did not put down the existing overlay. Everyone likes to guarantee their work, but how do you guarantee someone else’s work? You can’t.
Vicari recommends you put it in writing with the client that you are putting something on top of someone else’s work. “That’s the tricky part. You can test it and ask the right questions, but you don’t know if they did the right prep work. Let the client know all the risks about going over someone else’s work.”
His best advice: If you’re not confident about the existing overlay, remove it.


