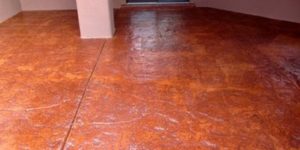
We know that interior concrete floors can be elegant, artistic, stylish and sophisticated, but warm? Yes, thanks to radiant heat technology. “Radiant heat is the only way to make concrete a warm, comfortable surface,” according to John Sweaney, Western regional sales manager for Watts Radiant, Springfield, Mo.
Valerie Wells, president and CEO of Artscapes Inc., Albuquerque, N.M., says more people these days are willing to use concrete as a final floor product. This increases demand for radiant heat. “Concrete is the most efficient way to use radiant heat — hands down, absolutely,” Wells says. “There is nothing like being about to move around the house in bare feet, toasty as can be. My clients love it.”
Mark Eatherton, operating partner of Advanced Hydronics, Denver, Colo., believes people should not be distracted by a heating system or by uncomfortable temperatures. “When you walk into a house with a radiant floor, you walk into a blanket of comfort,” he says.
The basics of radiant heat systems have been covered in this magazine and can be found on the Web site of the Radiant Panel Association. The purpose of this article is to cover some new developments in codes, materials and applications.
Insulation — the difference between comfort and failure
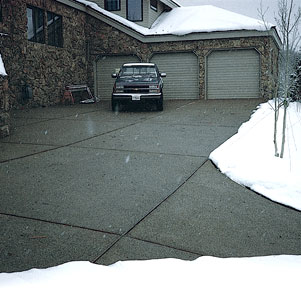
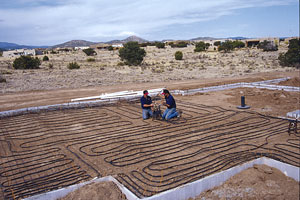
One of the most important facts to understand about radiant heat is that it is omnidirectional. This means that the heat is uneven and uncontrollable without careful planning. In a concrete floor, the tubing in an on-grade slab will heat the ground beneath it as well as the floor above unless it is properly insulated. Charles Krupka, president of FloorHeat Co. in Lansing, Mich., recommends using insulation with an R-value of 10 down to the footing and 4 feet into the building. “It is critical to insulate the sides of a concrete floor,” he says. “Do whatever you can to make the heat go up.”
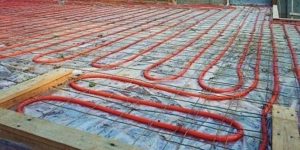
The most common insulation for pours on or below grade is extruded polystyrene installed under the slab and around its vertical perimeter, according to John Sweaney. “Insulation thickness and R-value depend on the location and climate of the project, but an inch to 2 inches is typical,” he says. He adds that tubing should be spaced 6 inches on center where it passes close to exterior walls and 12 inches on center four feet or farther into the room. Finally, he recommends following local best practices for moisture or vapor barriers.
“You absolutely have to insulate,” Mark Eatherton emphasizes. In fact, he was instrumental in creating local codes that require proper insulation. This requirement has since been included in the International Mechanical Code. The result is improvement in radiant heat’s reputation for efficiency and comfort.

A new insulation product solves several problems at one time, according to Bob Rohr of Show Me Radiant Heat and Solar, Rogersville, Mo. The Crete-Heat Insulated Floor Panel System is a modular EPS foam board insulation supplied in interlocking panels. A polystyrene film on the backside acts as a vapor barrier. A three-dimensional grid on the top allows installers to snap in hydronic tubing at accurately spaced intervals. The spacers extend above the tubing so the panels can be walked on without dislodging the tubing.
Concrete considerations
With the insulation and tubing in place, the next critical step is the concrete pour. “The biggest problem that could occur is that the tubing is too close to the surface of the concrete,” says John Sweaney. “We specify that a conventional concrete must be at least two inches above the top of the tubing. This prevents the concrete from cracking. Sometimes lack of planning results in pouring too thin because there isn’t room to go two inches over the tubing.”
Wells also emphasizes correct concrete thickness. “Remember that saw cuts are one-quarter the depth of the slab, so the tubing has to be set deeply enough to prevent damage,” she cautions. John Sweaney points out that the creation of expansion joints allows the two masses of concrete to move separately. If a lot of movement is anticipated, he recommends sleeving the tubing with PVC or other rigid materials for 6 inches on either side of the joint. This removes the stress of movement from the tubing and transfers it to the sleeve.
A key installation step is pressure-testing the tubing. Charles Krupka always conducts an air pressure test at 60 psi to 100 psi for 24 hours so he can identify and repair any leaks before the concrete is poured. Sweaney recommends keeping the tubing under pressure even while the concrete is being poured. That way if a tube is damaged and a leak occurs, it can be repaired before the concrete sets. “This is the one and only chance to see if the tubing has been damaged during the pour,” he says. “If you see bubbles, there’s an area where you’ve got a problem. You can make a repair coupling right there or block out the space for repair later. Today’s PEX tubing is so resilient that damage rarely occurs, but it only makes sense not to take chances.”
Concrete is moving into new decorative applications and radiant heat is not far behind. Bob Rohr has installed tubing in concrete sculptures, making them essentially radiant space heaters. Rohr also had tubing installed in a bathroom counter. The countertop was shop-fabricated with tubes for connecting to the boiler coming out the back. Installed, this connection just looks like an additional plumbing shut-off valve. “The counter is like a 400-pound cast iron radiator,” Rohr says. “It keeps the bathroom warm. It’s on a separate thermostat so we can enjoy a warm floor and counter year-round, even when we’re not heating the rest of the house.”
Poured gypsum underlayments
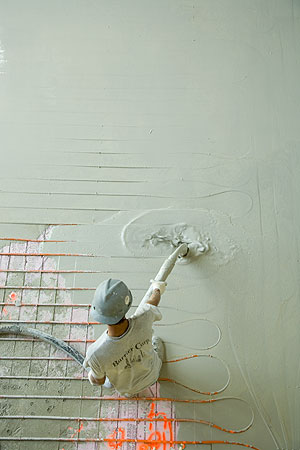
While concrete is considered by many to be the first choice for radiant heat in slabs on or below grade, gypsum cement is more often used above grade. Now a new product has been developed specifically for radiant heat that overcomes some drawbacks of this material. Levelrock Floor Underlayment RH from United States Gypsum Co. (a subsidiary of USG Corp.) offers a smooth, crack-resistant surface that can be topped with a decorative microtopping as well as traditional tile or wood flooring. High compressive strength and resistance to shrinkage set it apart from other underlayments as being especially well-suited for radiant heat.
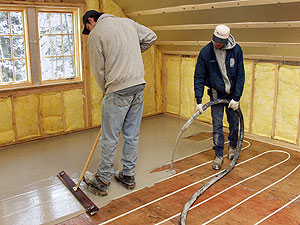
Levelrock is pumped through a hose in two stages. Dennis Socha, Levelrock business manager, recommends mixing the first lift at the lower limit of the slump range to make it stronger and hold the tubes in place. The second lift is typically poured at a slump toward the higher end of the range for a smoother finish. Slump tests are conducted on the job site to determine the flowability of the material. The second lift should be applied within an hour or two of the first lift or as soon as the first lift can be walked on to create a strong bond. A typical installation crew consists of four to six people. At the application end, there is one to handle the hose and one with a gauge rake to set the appropriate thickness and finish the material. A larger job may require an additional person to help handle the hose. At the mixing end, down by the pump, there are two more crew members — one person running the pump and one who is a material handler feeding the sand and cement. Again, larger jobs may require an additional material handler. A crew like this can install upwards of 10,000 square feet to 15,000 square feet in a day. The quick setting process of the Levelrock underlayment allows for trade traffic on the floor the next day.
This product is usually more consistent than lightweight concrete that might be used over plywood on upper floors. That’s because it is formulated under controlled conditions. No additives or ingredients besides sand and water are added on-site.
Partnering with other trades
USG sells Levelrock RH only to authorized applicators, according to market manager John Mandel. The authorized applicators can also install the microtopping, which can then receive a decorative stain or coating if desired. Some concrete contractors have added installing Levelrock or other floor underlayments to the services they offer. Other applicators may be drywall, insulation or flooring contractors.
Most successful radiant-floor installations involve a team of experts. Charles Krupka says a business like FloorHeat Co. is typically called in for design work. “We do a heat-load analysis based on the ASHRAE Design Temperature standard to see how many BTUs will be needed for the planned structure in the designated location. Then we work up a quote for materials, tube layout, manifolds for supply and return, the distribution panel and the boiler.”
Mark Eatherton recommends that the tubing be installed by a fully trained, qualifed hydronic-heating contractor. While some concrete contractors add this expertise to their repertoire, it is more common for them to partner with a plumbing or heating contractor.
Bob Rohr works closely with three or four different contractors, including a decorative concrete expert, on a regular basis. “They know the deal,” he says. “We all refer jobs to each other. Align yourself with superstars.”
Crete-Heat Insulated Floor Panel System
www.crete-heat.com
Levelrock Floor Underlayment RH from United States Gypsum Co. (a subsidiary of USG Corp.)
www.levelrock.com
Radiant Panel Association
www.radiantpanelassociation.org
