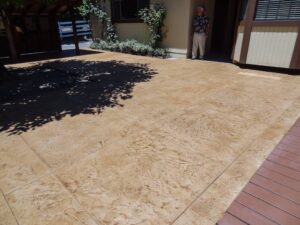
 When it comes to concrete, are cracks inevitable? Technically, if every aspect of the original pour was done perfectly, perhaps not. But in the real world, it’s a pretty safe bet that cracks are going to occur. Concrete cracks are caused by improper sub grade preparation, a bad mix design, poor thickness control, and improper curing. Other causes include poorly placed control joints, temperature changes, stress loads, ground or building movement, and more. Each of these reasons can cause problems on their own or in combination and repairing concrete cracks can become a hassle.
Contractors are frequently called in to repair or camouflage concrete cracks. A homeowner with a concrete driveway, walk or patio may decide that the cracks are unsightly and need to be fixed. Cracks in basement or garage floors often need attention. Darryl Manuel, president of Vexcon Chemicals Inc. in Philadelphia, observes a trend in turning older buildings — often featuring concrete floors with lots of cracks — into lofts and retail spaces. And in new retail and commercial spaces, concrete floors are often specified for their durability and longevity, cracks not withstanding.
When it comes to crack repair and the decorative treatment of the concrete surface, a dozen contractors have as many recommendations. Different kinds of cracks, it seems, require different repair techniques.
“The first thing about concrete cracks is that just about every crack is different and how you repair a crack depends on what your coating is going to be,” explains A. Ray Anderson, owner of Only Under Pressure in Thousand Oaks, Calif.
Being a crack detective
Some cracking is a one-shot deal. Such as when the cracks occurred because of curing problems or an over-size truck ran over the slab. These are static cracks, unlikely to move. Structural and other types of moving cracks, on the other hand, typically present ongoing problems. As Tom Ralston, president of Tom Ralston Concrete Inc. in Santa Cruz, Calif., points out, “You have to honor all structural cracks. They’ll continue to move.”
Mike Meursing, manager at Versatile Deck Coatings in Long Beach, Calif., says, “Once you locate the cracks and failures, it is important to determine the cause, otherwise your repair will be just a short term fix.” If there is still stress present, the concrete will crack again. There are clues to what may have caused the cracks, he adds. Here are some examples:
- If you have a full-depth crack and the surfaces on either side of the crack are not level it’s probably due to an unstable base.
- When the slab is on a slope and the cracks run perpendicular to the slope, it’s likely slippage is the cause.
- If you observe random cracking and see or know heavy machinery has crossed the concrete, excessive load is probably the cause.
- Surface spalling or cracking where the rebar is located indicates that corrosion of the rebar is the culprit.
- Impact cracks are frequently indicated by a spall.
- Freeze-thaw cycling often causes widespread and consistent cracking across the concrete.
- And, if there isn’t an apparent cause for the cracking, but you notice curling on the surface or sporadic cracking, it’s likely due to shrinkage.
Prepping and repair material options

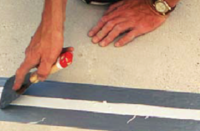
No matter what decorative topping you’re planning to apply to the surface of the concrete — stain, opaque coating, bonded or unbonded overlay — you need to make any crack repairs first. The customary practice is to chisel or chase the cracks. Not only does this help you clean up the edges of the crack, chasing also provides a slightly larger slot in which to insert the repair material.
The size of the chasing blade you’ll need for the task depends on the width of the crack, reports Jason Root, western region products specialist with USF Surface Preparation Group in Rancho Dominguez, Calif. “A lot of people like to chase the cracks with a V-shape or you can use a square-edge blade.” The typical blade widths used for chasing random cracks are 1⁄4-inch, 3⁄8-inch and 1⁄2-inch, he says, adding, “When chasing a random crack, a smaller diameter blade is better. The smaller the diameter of the blade, the tighter the radius you can turn.”
 There are three general categories of crack repair materials, explains Ronald Borum, executive vice president of the Miracote Division of Crossfield Products Corp. in Rancho Dominguez, Calif. Rigid repairs are referred to as welds and the resulting repair is rigid. These materials “replace the physical integrity and create a seamless substrate”. Epoxy and polymer cementitious fillers are typical of this category, he says.
Different Categories for Different Jobs
Products in the semi-flexible category “are used more for joint sealing than crack repair,” Borum says. “Because they’re semi-rigid, they can tolerate some movement. They’re good under a coating that can tolerate some movement, providing good support for the coating.”
Flexible repair products are most commonly used for minor crack repair and the crack is stable. Minor cracks are when the crack is 1⁄8-inch to 1⁄16-inch or less. These products bridge the crack, are gravity applied or spackled in.
In certain situations, you may need to stitch across the crack. This technique generally results in a strong repair, though it may not be pretty.
Which repair product you use is dependent on the nature of the crack. Additional steps you’ll take to relieve any ongoing stress in the slab (such as creating additional control joints) and the decorative coating you’ll be using on top.
Terry Collins, concrete construction engineer with the Portland Cement Association in Skokie, Ill., reminds contractors, “there’s a constant volume change happening all the time in concrete [as it expands and contracts]. If you lay the jointing out correctly, it provides a weakened plane for a crack to follow versus a random crack.”
Repair recommendations
As mentioned earlier, contractors use various techniques in repairing cracks and prepping the surface for a decorative coating. As Anderson points out, often “you just have to get out there and see what works and what doesn’t.”
Always wash out the crack with a pressure washer or blow it out with compressed air. The crack needs to be clean for good bonding with the repair materials.
 If you’re using a concrete stain, your “repair material needs to match the surroundings — cementitious is often the preferred material,” observes Borum.
Manuel recommends using a bonding agent on the sidewalls of the crack if you’re using a cementitious material for better adhesion. “Feather the patch if you’re going to coat or stain the surface,” he adds.
If using epoxy, be sure the material completely fills the crack, advises several contractors. If you are filling only a portion of the crack — say the top inch or so — what you have is an upside down control joint, and you know what will happen — it will crack.
With epoxy, pressure-feed injection is best, reports many. Also, using a thixotropic epoxy can be advantageous. A thixotropic epoxy congeals as it works its way down into the crack. This lessens the runoff of the material out the bottom of the crack. It allows the material to fill up the crack and then cure.
Preparation and Patiences
With caulk-like repair materials, Darrell Adamson, vice president of Engrave-A-Crete Inc. in Sarasota, Fla., recommends using a backer rod if there’s room. “You need a nice bond to each side of the crack, but the center band needs to be thin to be springy or stretchy [if there’s movement].” Adamson uses a syringe when applying caulking to small cracks and he says, “If you need to scrape excess away, cut it up and away. Don’t smear it down with your finger. Or you can wait for it to cure and cut it flush.”
To prepare the top surface of the concrete after crack repairs have been made, Anderson recommends shot blasting to give the surface a profile. Followed by an acid wash to neutralize any alkalinity and open up the surface pores to accept the coating.
“You can be creative in how you repair, [but] a good repair is taking your time. Don’t do the job in a hurry,” advises Wes Vollmer, owner of Alternative Finishes in San Antonio. Take the time to talk with the engineer, he advises. “You’ll educate yourself for future jobs. Ask how you can manage cracks and where you should put control joints. You have to be smart about how you do your work.”
Cracks as decorative elements
Mark Donaldson, owner of Skookum Floors USA Ltd. in Seattle, says that using cracks as decorative elements is probably a specialty or niche area. However, he and other contractors have come up with ingenious ways to hide cracks in plain sight.
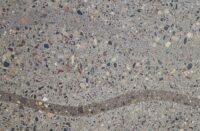
A random stone look is a natural decorative effect that uses random cracks, observes Lee Tizard, technical sales representative with Floric Polytech Inc. of Rancho Cucamonga, Calif. After chasing out the cracks and applying a knockdown texture, cut additional random cracks with masonry saw blade to create a faux flagstone effect, he says.
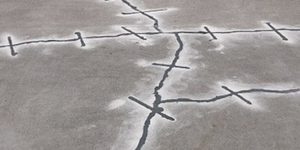
 Ralston devised his own variation on the random stone theme with rave reviews from customers. Instead of creating a random stone effect across the whole surface, he uses it only in certain areas. Ralston does not chase the cracks, but marks them with nails and applies a 3/8-inch topcoat over the slab. Then he uses the nails as a guide to score the original cracks using the point of a trowel or rat-tail. He carves out random stone shapes in the topcoat (using a stick or rat-tail for a “more authentic looking joint”) only along one side of the cracks and dusts these with earth tone colors. He dusts the remaining areas in between with a sandstone color. In this way, the sandstone colored areas appear to be bordered by random-laid stones.
Natural Verses Patterns
Not everyone wants a random stone look, however. Vollmer says one of his customers wanted a more traditional tile pattern. To achieve the look, “We laid the pattern around the cracks and cut the cracks first. Then we popped chalk lines and cut the rest of the pattern.”
For a more realistic look, “small spider cracking is good for leaves and other organic [design] elements,” says Meursing. Additional saw cuts can help incorporate the cracks into a design.
Donaldson suggests you can garner nice effects by highlighting a crack. “Insert color in the crack with a sprayer, allowing the color to absorb on either side of the crack.”
Other creative options include either routing out cracks or spalls and gluing in marbles. Additionally, filling the voids with another color or material for an inlay effect.
As Vollmer points out, “There’s nothing you can’t do with decorative concrete if you have an open, creative mind.”
Never say never
No matter what your decorative effect, “Cracks can be filled, but with no expectation that they are fixed,” admonishes Adamson.
Crack repair is a big deal, but “I would never guarantee a customer ‘no cracks,’” reports Donaldson.
“Never warranty cracks. They’re there for a reason,” exclaims Anderson.
Do you observe a common thread in these comments? That’s right — don’t guarantee that the cracks will not return. Tizard has even developed a flow chart to help keep him on track with concrete crack repair. Including the options to get a signed release or to stop the project if the customer’s budget isn’t sufficient. It also accounts for when the customer doesn’t want the cracks repaired. Otherwise, his flow chart works its way down to varying repair techniques based on the type topping to be used. It can include rigid and hard or soft and flexible — and the size and type of crack. Creativity seems to be his only variable.
Across the board, contractors are becoming more creative with repairing concrete cracks and the decorative effects they can help achieve. As Meursing observes, “Taking a defect and turning it into art, that’s art!”
