How do you tell if a floor has been profiled correctly without the use of a testing device? As a contractor, manufacturer or customer, this is an important topic.
First, some history: When polished concrete initially came to the market it was mainly used for industrial and manufacturing facilities. Back in the late ’90s and early 2000s, there was no good way to color polished concrete floors. Back then, the coloring process of choice was acid stain and that doesn’t work well with polished concrete as the two processes fight one another.
Once concrete dye was invented, polished colored concrete became a valid architectural finish. However, there were no stain protection options available. The only chemical treatment we had was densifier. Densifier did a good job of hardening the finish and creating a much longer-lasting floor. We quickly figured out that installing densifier after color would assist in holding more color in the concrete.
Concealing the chips
But there was one big issue with these newly colored floors. Chips were very visible. Recently, I met up with a guy who worked for me about 15 years ago, and he reminded me of a big school we did early on using dye. We didn’t know enough back then about protecting the concrete during construction. After we finished polishing the floors, there were numerous chips in the concrete and the customer was most concerned about the main entrance and the cafeteria areas.
The district was very picky, so the solution was to man mechanics’ dollies with 10 guys and give each a small paint brush and jar of acrylic sealer. The crew then rolled over this 10,000-square-foot area on their stomachs dabbing sealer into the chips to let the color show through. This process would darken up the chips and show the color, which was then a close match to the polished concrete. As you can imagine, I wasn’t a very popular boss when I explained what we were going to do.
As we showed this issue to more and more manufacturers, one manufacturer eventually presented us with a possible solution. By using an extremely low-solids sealer, we could put a thin coat over the entire floor that would serve two purposes. We could sell it to customers as a stain-preventative layer and, if we could get customers to buy it, this small amount of sealer would correct the specific issue we were trying to fix with the sealer and small paint brushes.
The “stain protection” would darken the chips and show the color better throughout the entire floor. This seemed like a win-win solution. The prior method wasn’t realistic to install over large square footage, and this new process was much quicker. I don’t think anyone in the industry at that time could foresee how these products would be abused over the next few years.

Shortcuts don’t pay off
Prior to the invention of stain protections, polishers were true concrete artists. Every area that had scratches was clearly visible. They had to mechanically polish the concrete to get the high-gloss shine because there was no chemical way to achieve that shine. Soon after topical stain protection was introduced, contractors figured out stain protection would hide some scratches so they could mechanically polish less and complete jobs quicker.
It didn’t take very long for the next move. Some contractors figured out they could skip half the steps altogether and get a shine like mechanically polished concrete if they applied two or three coats of sealer/stain protection onto the floor. This realization started a pricing spiral from which the industry is still trying to recover.
By only grinding the floor with half of the steps — using much less labor and buying a lot less expensive diamond tooling — contractors could install floors at less than half the cost of a full systematic mechanical polish. Once they were able to remove half of their expenses, these contractors figured they could still make a good profit while bidding the projects at a much lower price. If these contractors bid polished concrete floors at a lower price, they would in turn win a lot more work.
The overall price of polished concrete flooring went down by more than 50 percent in the following three years after topical stain protection was introduced. It became very difficult for traditional polishing contractors to compete and show a profit. The issue quickly started to cause additional problems. This was because owners found their polished floors lost their shine in a short time. In high-traffic areas, the gloss was typically gone in 90 days or less.
I started looking for floors completed using multiple coats of stain protection or guard and following up on these jobs after six months. The customers would typically be frustrated but would gladly pay for a redo to correct their floors after they had lost their gloss.
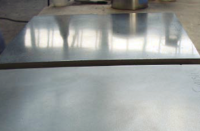
The photo shows a typical floor where the gloss is created by stain protection. Notice the clarity of the reflections is not very clear. Also all the lights have a halo effect around them similar to what’s projected by wax on VCT (vinyl composite tiles) floors.
Back to the basics
When you look at a floor with a stain protection gloss by itself, it looks good. Customers who don’t regularly look at polished concrete can’t easily tell the difference.
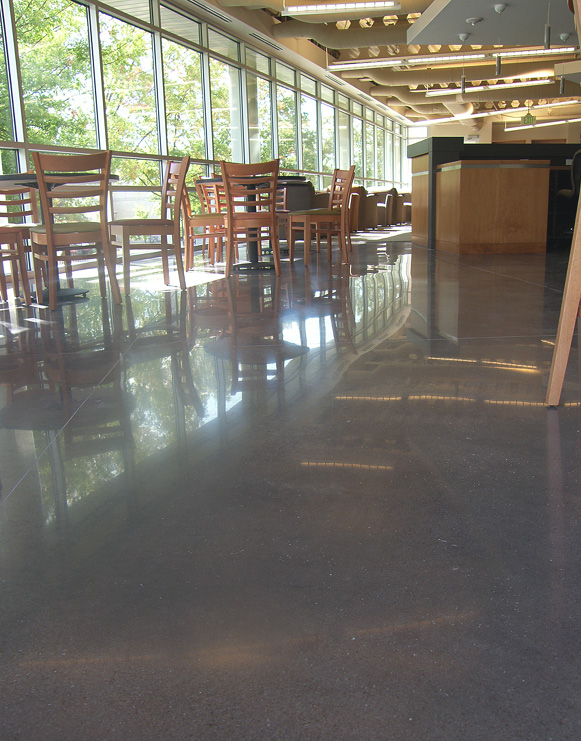
However, when you look at a floor that has been polished well mechanically, you can see the difference. This photo shows a mechanically polished floor with a very thin coat of stain protection. The reflection is clear and all the reflected items, including the lights, are crisp and have clear edges. This is indicative of a polished concrete floor that will hold up well to traffic.
The issue of polished concrete floors sold using stain protection is still a big problem today. The industry has reacted in a few different ways. Some specifications call for gloss testing or refinement testing before stain protection is applied. This option sets the baseline before the sealer can be added to the finish.
Some manufacturers have introduced penetrating stain protection. The can handle the stains but it doesn’t have any visible effect on the surface polish. Some specifications call for specific grinding and polishing steps in addition to a gloss measurement. These are all attempts to get back to the mechanical polish that the industry was built on.
Resin transfer woes
Over the last few years, another issue has arisen. Due to pricing constraints, tooling manufacturers have gone to Asian manufacturing for some of their tooling offerings. This trend was discussed in detail in an article titled “How to Choose Abrasives for Polishing Concrete.”
The lower quality control of this low-cost tooling supply market sometimes creates a situation where resin-bond tooling doesn’t have enough diamond particulates, or the resin used to hold the particulate is especially soft. Either issue leads to “resin transfer” which can create a situation where a floor has a high gloss that’s created when the resin melts and leaves a film over the surface.
Typically, the scratches from the grinding steps aren’t removed but instead are filled in with melted resin. This can provide a high-gloss finish that also doesn’t last.
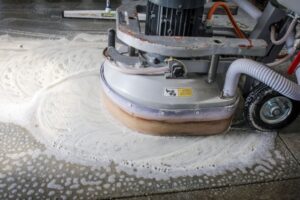
This photo (below) shows a finished area where the shine is created from resin transfer. The lights have “tails” due to the rotation of the machines as the resin melts on the surface. Like those produced by stain protection, these reflections also have a hazy appearance. These floors typically lose all their gloss in six months or less.

Proper polishing pays
The best floors have been mechanically processed and the gloss is generated from the concrete’s flat surface profile rather than created by artificial means. Properly polished floors allow owners to use lower-cost maintenance options to keep the floors looking good with a high-gloss finish.
Knowing how to tell which type of finish you’re looking at can help contractors and customers alike. There are plentiful contractors in the industry today installing floors that fall into these categories without intending to. Understanding the difference and what causes each outcome can help you be a better contractor.
