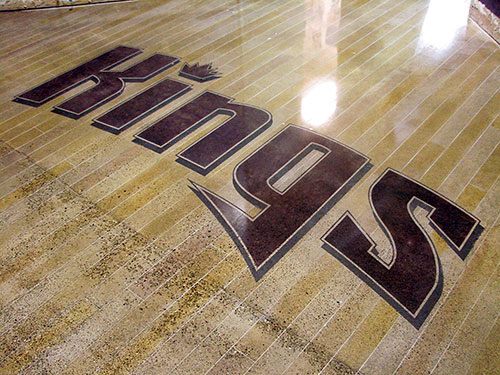
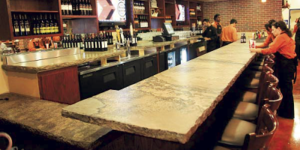
This technique incorporates an embossed team logo, handsome basketball-inspired line art and a beautifully rich planking pattern into one stunning polished and engraved floor.
Ingredients:
- Colledi Designs 22 mil sandblast stencil (you can use any pattern, but in this case the stencil was cut with the Sacramento Kings logo)
- AmeriPolish Solvent-Based Dyes: Midnight Black, Maroon, Patriot Blue, Gold, Sand, Chocolate Brown, Walnut
- Acetone (for diluting the dyes)
- SealSource International Harden X lithium densifier
- SealSource International SS DuraGloss 50+ polish guard
Special Equipment Required:
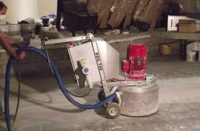
- Polishing machines (Colour uses the HTC 800 classic and HTC 500)
- full range of grinding discs from 40-grit metal-bonded up through 800-grit resin
- masking tape
- plastic sheeting
- Blastrac 1-9DEZ 9-inch shotblaster with steel shot
- Makita 4.5-inch Angle Grinder with a 4-inch Concrete/Masonry wheel
- Engrave-A-Crete Cobra engraver
Directions:
There are three elements to this floor: the embossed logo stencil, the line art in the shape of a basketball’s seams, and the plank pattern across the entire floor, mimicking the look of an indoor court. Each part of the technique is done separately, but they all come together for a unified look.
- It all starts with grinding your concrete surface, beginning with 40-grit metals and stepping up to 80-grit from there.
- Apply one coat of lithium densifier once you’ve finished with your 80-grit discs, and let the surface absorb it completely.
- Continue grinding, progressing up to 400-grit resin pads.
- Once you’ve finished a pass with the 400-grit pads, clean the surface thoroughly to remove all dust and debris. Let the floor dry completely.
- Apply the logo stencil design to the surface carefully, following the manufacturer’s instructions to ensure that you have an even, secure transfer of the pattern. For this pattern, the initial stencil transfer will leave only the outline and shadows around the lettering exposed. This is the area you’ll be embossing and staining first, and then you’ll stain the rest of the lettering a few steps later.
- Mask the area from the edge of the stencil outward with masking tape and plastic sheeting, protecting the surrounding concrete from unwanted shotblasting.
- Shotblast the stencil pattern, making three or more passes, until the desired amount of material is removed, leaving the design embossed on the surface.
- Vacuum to remove dust and any stray shot from the design area.
- Apply Midnight Black dye at full strength and spray it over the stencil so that all the embossed areas are dyed black.
- Remove the stencil pieces for the logo’s letters and apply a mixture of roughly three parts Patriot Blue to one part Maroon with a sprayer to create the royal purple of the team’s logo.
- Let dyes dry for a minute or so before removing the rest of the stencil.
- Clean any residue off the surface.
- Chalk out the basketball line art, and engrave those designs with the angle grinder.
- Measure out 4-inch wide “planks” in random lengths, to mimic a real wood plank floor, and snap chalk lines to mark them.
- Use the Cobra to engrave the long, straight lines between planks. Use the angle grinder for the small lines and to detail intersections, being sure not to cut through the logo area or the large basketball line art.
- After all the engraving is complete, clean the entire floor thoroughly.
- Mix several batches of Gold, Sand, Chocolate Brown, and Walnut dyes heavily diluted with acetone. Apply to random planks to achieve the look of a wood-planked basketball court.
- Once those dyes have dried, mask off the basketball line art and apply the same mix of Patriot Blue and Maroon that you used on the logo’s detail work.
- Once all your coloring is complete, continue to polish the floor, stepping up from 400 grit to 800 grit to get the high-gloss finish.
- Clean your floor very thoroughly and apply two coats of polish guard, burnishing after each coat.
