 Recipe by: Colorado Hardscapes Inc., Denver, Colo.
www.coloradohardscapes.com
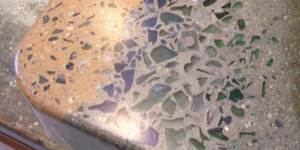
This complex interior treatment pairs a multihued pattern of polished concrete with natural river-stone borders and detailing.
Ingredients:
- TenCate Geosynthetics Mirafi 140N nonwoven geotextile bond-breaker
- Aluminum divider strips, 1/8 inch wide by 3 inches deep
- Masonite strips, 1/4 inch thick
- Lithocrete Conditioner
- Colorado Hardscapes custom integral color: Dusty Trail
- Locally quarried 1/4- inch stone aggregate, chosen to complement the integral color
- Fine-grade black sand
- Bomanite Concrete Dyes (Colorado Hardscapes used Blue Poppy and two custom blues)
- Bomanite Stabilizer Pro lithium silicate densifier with silane
- Bomanite VitraFinish stain guard
- River stones
- Neutral-colored tile grout
- Special equipment required: polishing machine, abrasives from 30 grit to 800 grit, burnishing pads
Directions:
- This installation is designed to go down over an existing concrete floor, so your first step is going to be to put down a bondbreaker, in this case the Mirafi 140N, which should cover the entire surface of the floor.
- Once the bond-breaker is down, mark out the desired pattern on the surface. For this installation, artisans chose a geometric pattern that uses a range of colors for a nice variety. It will be important to keep track of which section is going to be which color, so make sure you have a detailed layout that shows which sections get which treatment. In the case of this recipe, you have three to keep track of: grey concrete that will get dyed later on, integrally colored concrete that won’t, and the river-stone inlay borders and details.
- Mark out your pattern on the floor and install 3-inch deep, 1/8-inch wide aluminum divider strips to serve as borders between sections. Reinforce these with Masonite strips, which will be taken out later.
- Add the Lithocrete conditioner and aggregate to all of your concrete and mix thoroughly. In one batch, add the black sand to your concrete at a ratio of 1 to 4, and add the integral color as well. Mix thoroughly.
- Time to place your concrete, all of which is going to be 3 inches deep. In all of the sections that are going to be dyed, place the grey concrete. In all of the sections that you want the earth-toned concrete, place the integrally colored batch.
- Once everything is placed, remove the Masonite strips (except in the sections destine for the river stones), and let the concrete set for 24 hours. Then come back and cut your control joints.
- Let the concrete cure for 28 days.
- Once it’s cured, use decorative saw cuts to mark out different sections of the grey concrete that will receive different colors of dye.
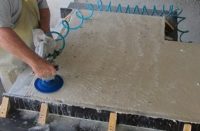
- Apply the Stabilizer Pro to the entire surface, let dry, and begin the polishing process. Start with 30-grit abrasives, and step up gradually, keeping an eye on the slab’s surface porosity, which will be the deciding factor in when to stop and dye the surface.
- The optimal time to apply your dye will vary from job to job, but it typically comes around midway through the polishing process. At the right time, apply your dyes. For this installation, Colorado Hardscapes alternated standard colors like Blue Poppy with custom color blends to get a wide variety of shades, ranging from royal blue to midnight.
- After applying the dyes, continue polishing the floor, stepping up your abrasives until you reach 800 grit.
- Clean the surface thoroughly, being careful to remove any residual dust.
- Apply a coat of VitraFinish, and once dry, burnish the entire surface.
- Caulk your control joints and decorative cuts. Finally, fill in the remaining sections of the floor by placing an even coat of grout and setting river stones into it.

