Achieving a fine polished look in concrete countertops requires using progressively finer grits of diamond pads. I define three stages: grinding, honing and polishing. Depending on the look you are trying to achieve, you may start or stop at any point along this progression.
Regardless of the look you want and whether you do one stage or more, the most important guideline is: Do not skip grits. Each grit in the progression is designed to smooth out scratches from the previous grit. A 3,000-grit pad is incapable of smoothing out scratches from a 200-grit pad, no matter how long you grind.
Grinding: exposing aggregate
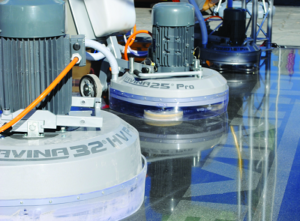
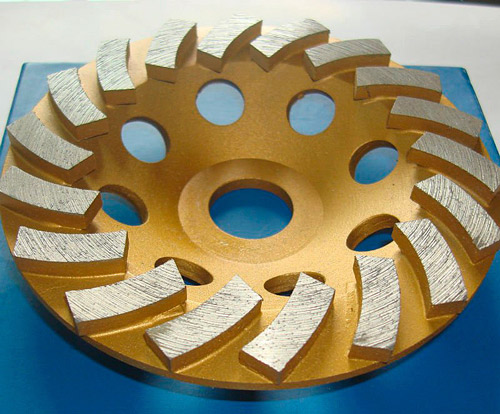
Exposing aggregate cast into the concrete requires very aggressive diamond tooling. Metal-bond cup wheels are the fastest for exposing aggregates but leave the roughest surface. Cup wheels are rigid all-metal discs that have thick, diamond-impregnated metal segments mounted along the outer edge of the disc’s face. Only heavy-duty polishers can handle cup wheels on a regular basis.
“Turbo cups” come in a variety of styles and sizes. The most useful are coarse discs that are 5 inches or 6 inches in diameter. Larger-diameter discs spin faster (and therefore cut faster) and are more stable and less likely to dig into the concrete. Smaller diameters are useful for smaller sections of concrete and for edges. A special edge wheel is available that has a smoother face and wider diamond segments. Certain turbo cups are designed to be run dry or wet.
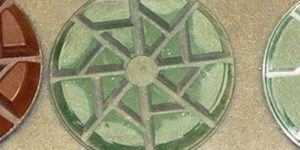
There are also 30-grit brazed metal and resin-based discs that grind less aggressively.
Grinding produces vast amounts of cuttings. It is best done wet to eliminate the clouds of hazardous silica dust that are generated when concrete is ground dry.
Honing: the salt-and-pepper look
Honing begins with a 50-grit resin pad, which is fairly aggressive and can be used to lightly expose small aggregate. The scratches and gouges left by a cup wheel are removed using a 50-grit resin pad.
Honing refers to smoothing and scratch removal, and it generally involves using the 50-, 100- and 200-grit discs.
A surface honed with a 200-grit pad is smooth, scratch-free and totally without gloss or sheen. There may be swirls in the surface, but there are no deep scratches. Grouting generally occurs after the 200-grit step. A 200-grit is not aggressive enough to cut into the concrete and open up more pinholes, but a 200-grit is just aggressive enough to cut away hardened grout.
A salt-and-pepper look refers to only exposed sand grains being visible. Often this look can be achieved by removing the cement cream with a 200-grit pad in one step, exposing the cement paste matrix.
Polishing: high-sheen development
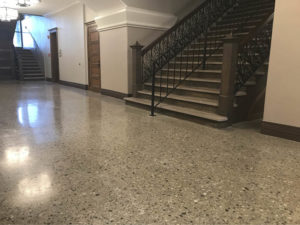
Polishing uses grits ranging from 400 down to 3,000. Often densifiers are used around the 200-grit to 400-grit steps to help improve the cement paste’s hardness.
Wet polishing leaves a very good finish, but the highest sheens seem to come from dry polishing at the end. My preferred sequence is to wet-hone and polish up to 1,500 grit, then switch to dry pads for the 1,500-grit and 3,000-grit steps.
Sealer: Yes or no?
Most topical sealers will not stick to a surface honed finer than a 200 grit. What’s more, even if a sealer will stick to a polished surface, it is often impossible to tell the difference between a sealed concrete surface honed to 3,000 grit and a sealed concrete surface honed to only 200 grit. Essentially, polishing concrete is a waste of time if you plan to apply a topical sealer after.
If you do want to create a polished surface and apply a densifier (which also serves as a penetrating sealer), you will continue the grit progression all the way to 3,000. Again, a densifier would often be applied after honing, at grit 200. The densifier makes the cement paste hard so that it can be polished. Once the densifier takes, polishing proceeds from 400 grit onward.
Wet and dry
Grinding, honing and polishing can all be performed either wet or dry. However, diamond tooling designed to be used wet almost never can be used dry, whereas some dry tooling can be used wet.
Wet processing doesn’t require a variable-speed polisher, but using one gives you greater control. Dry processing always needs a variable-speed polisher, since the cutting rate, pad temperature and finish quality all depend upon tooling speed. In addition, dry polishing should always have effective dust extraction, using equipment designed to handle fine concrete dust. This crystalline silica dust is a serious health hazard.
The advantage of wet processing is that it’s generally faster, produces better results at most grit levels and doesn’t produce any dust. The advantage of dry processing is that it doesn’t generate huge amounts of wet mess, so it can be used inside a home when a powerful dust collector is used. Dry polishing also tends to produce a higher gloss level.
Aggressive grinding with metal cup wheels can be done either wet or dry, and neither way is particularly faster. Dry grinding creates huge amounts of dust, while wet grinding produces huge amounts of water and slurry.
Honing (50-grit to 200-grit) is much faster when done with water, which flushes the cuttings, improving surface finish as well as the tool’s life span. Dry honing is slower and can leave scratches in the concrete if the polisher’s speed isn’t carefully adjusted to be fast enough to fling out cuttings but not fast enough to cause pad glazing or melting. Here ceramic binders are superior to resin binders that are resistant to high temperatures.
Polishing wet isn’t necessarily much faster, but because of the water stream flushing the cuttings, you tend to get better results when you use coarser polishing grits (400 to 800). Dry polishing yields better shine when you use very fine grits (1,500 to 3,000), probably due to a combination of binder properties, speed, pressure and the polisher’s ability to see what’s happening and adjust the process to achieve the best results.
In summation
Remember that the pad you want to use is determined by the surface and material you’ll be grinding, honing and polishing, so keep in mind the benefits and limits of the various diamond pads:
- Metal-bond cup wheels and lower grit pads are the fastest for exposing aggregates, but leave the roughest surface.
- 50-grit to 200-grit resin pads will do the best job of honing.
- Using densifiers around the 200-grit to 400-grit steps will help improve the cement paste’s hardness.
- 400-grit to 3,000-grit pads will create the polished sheen.
- Also remember that knowing the differences between pads alone isn’t enough to produce high-quality finishes. Ask yourself the following sealer questions to make sure you don’t cost yourself money, time or quality:
- How finely do I intend to hone the surface? Does it need a topical sealer? If so, stop at 200 grit.
- When should I use a densifier? Should I use dry or wet pads to polish?
Make sure you know the key differences between wet and dry processing, and always make sure to use the appropriate tooling for each.
Keeping these tips in mind will allow you to produce the highest-quality surfaces, while potentially saving time and money by helping you avoid mistakes. The right pad and the right process at the right time can bring your craft and product to a new level of excellence.
