All concrete polishers are aware of the many subpar polished floors out there that are giving polished concrete a bad name. I get several calls each week asking how to fix a bad floor, so I am sure that you are dealing with this as well.
I propose the “Profit & Transformation Challenge 2011” to all of the concrete polishers who consider themselves craftspeople in the industry. Let us call on all of the owners of the mediocre-quality polished floors in each of our cities and towns. Let us show them how their floors should perform and how they should look when properly polished by professional craftspeople. This could mean doing a mock-up (like the one I wrote about in the November/December 2010 issue of Concrete Decor) that would let them see for themselves. The proof will be right in front of their eyes.
This would accomplish two things simultaneously. First and foremost, it would create more opportunities for your company to make money. Second, it would transform and rejuvenate the reputation of polished concrete.
Accepting this challenge, with a lot of effort and hard work, would get rid of most of the lousy-looking, dull, accidentally stained and low-performing floors in your areas, which will translate into more people seeing high-performing, clean and beautiful polished concrete floors with consistent, long-lasting shine.
Eventually, we could charge a higher price and halt the downward price spiral.
If you send me your successful transformation stories, then I will report on them throughout the year. Together we can alter history.
This begs the question: How do you go about fixing an existing polished concrete floor?
How to clean for a reboot
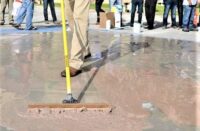
The inspection and evaluation process begins with a thorough cleaning. Use hot water and a slightly alkaline soap, scrub with a new brush made of medium-soft nylon bristles, then rinse thoroughly until the rinse water is clear, followed by extracting all residual water off the floor. This process allows the dirt and grime to float in a soapy solution, become diluted and be removed from the pores in the concrete. Think of cleaning a floor like washing your hands — in warm water they get cleaner faster. So why use cold water when trying to clean a floor?
Why a brush instead of a pad? A pad rubs across the surface and can force the loosened dirt back into the open pores of the floor. A dirty pad can scratch the floor with trapped particulates as it is trying to clean. Brushes offer several advantages. Newer brush bristles are vertical to the concrete and can loosen the dirt from within the concrete pores as well as on the surface. Also, bristles are much easier to clean and water will flow between them, which allows for proper rinsing of the floor. And lastly, the brush can be reused.
Extraction of rinse water simply means using a wet vac or walk-behind scrubber. These are a must. Standard squeegees and mops push the dirty water back into the pores as they are moved across the concrete.
Use clean brushes. Remember, your floor is only as clean as the water that you remove from it, and equipment cleanliness can make all the difference.
Characterizing the floor
Now that you have a clean and dry floor, photograph the problem areas and take a closer look. Is the floor really etched or just stained? This is the time to consider and plan the work that will need to be done.
Sprinkle a few dime-sized water drops randomly around various parts of the floor, then watch and wait. Is the water sitting on the surface in a bead or a flat spot? Is it absorbing in and darkening the concrete? Is the water starting to spread like it does on a paper towel? Is it being repelled in some areas while being absorbed in others? What does all of this tell you anyway?
When water penetrates into the concrete surface, the floor will also absorb densifier in that same way. This is very good news. The more densifier you can get to penetrate into that piece of concrete before restaining, repolishing or recoating with “guard,” the better this restoration is going to look and perform.
Redensification seems to be such a simple thing to do, but it is one of the most overlooked elements of restoring a polished concrete floor. Your floor will be denser, harder and more abrasion-resistant, and it will take on a shine with more clarity. You will be glad you took the time and did the job right.
If the floor will absorb water but is a mess, it probably needs to be reground to remove or repair a rough, etched, stained or worn spot. Discuss with the owners; listen, learn, and confirm the extent of the re-grind (which may reveal aggregate) and re-polishing desired. Will the owner be happy to just have the repairs completed, and then simply have the rest of the floor cleaned and burnished? Or does the owner want the entire floor to be richer and glossier? This may include running a set of 1,500 diamonds under an actual grinder or using a diamond-coated burnishing pad or brush. There are so many new generation polishing products hitting the market, and one of these may be just the right product for the job.
For a severely etched or damaged area, you might have success with one of the newer concrete-polishing repair fillers. In addition to my company’s silicate-based Vexcon Fusion, there are other products that use acrylic latex binders or have similar approaches. These products mix with the concrete dust from grinding to refill the voids and cracks in the floor, resulting in a smoother, rebuilt, restored concrete surface.
Blending the results
Now, how should you blend the repaired area with the rest of the floor? First, strip any film-forming guard-type product from the area surrounding the repair and from any other areas that you and the owner previously agreed should be restored. Guard-type products disguise and enhance the floor, and they must be removed for the repair to match the surrounding area. Remember, do not just polish and put more guard on the floor unless you are sure that this is all that the floor will need. Once a film-forming guard (or a nonfilm-forming “finish coat”) has been applied over the repair or surrounding area, neither additional stain nor densifier will be absorbed.
After removing the guard, grind or repair the surface. Apply stain, dyes or pigments to the repaired area to blend it with the surrounding field. Densify “to rejection” by feeding the floor with densifier until no more will absorb. Ensure that the densifier penetrates into the slab instead of puddling on top. Proper densification is the foundation of a wear-resistant and shine-retentive floor.
Then, polish the repaired area with resin bond diamonds, overlapping onto the surrounding area. This way, the shine and reflectivity will look more even, diverting attention away from the repaired area.
Finally, either a film-forming guard or a nonfilm-forming finish coat can be applied evenly across the entire floor and burnished at a high speed.
That old and tired floor will have turned into a showpiece, and the owner will once again be proud of and want to talk about his or her beautiful polished concrete floor.


