I got into acid staining as an extension of my former life as a painter on canvas. In fact my earliest works were not on canvas, but on hardboard panels mounted on stretcher bars and coated with plaster of Paris.
While the plaster was wet, I could incise it or swoosh it around on the surface. Once it had hardened, I would sand the whole surface with a finish sander, so the actual profile was seldom more than 1/8 inch thick. I thickened my acrylic paints with marble paste and used a stiff brush or palette knife for more texture. When the layers were dry, I could make a thin glaze of dark or iridescent paint and wash it over the whole piece. Another sanding would expose bits of bright color emerging from the glaze.
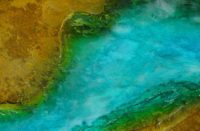
I always loved antique weathered doors and these paintings were an attempt to replicate and hasten the weathering process. To my chagrin they ended up looking unlike doors, but more like satellite views of other planets. So I went with the flow and made a series called “Postcards from Space.” Most of them were small — about 15-by-19 inches like this one — and sold well to collectors of small works.
A texture was born
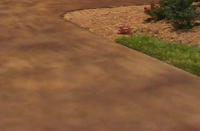
When I landed my first staining job in 1994 of an old restaurant floor, I wondered, “How can I get the look of texture on this floor without creating cleaning problems?” The L. M. Scofield instructions said, “Rags can be placed on the wet stain for a marbled look.” After a trip to the thrift store for old sheets, and some false starts, our first simulated marble texture was born. We discovered that dry fabric left no mark, so every rag had to be soaked in water, wrung out and kept nearby in advance of staining (see results below).
As my company grew, I usually hired my neighbors — struggling artists and musicians who also thought that it was fun to get cool effects with humble materials. We never counted the cost of our labor, although it would take us three or four times as long to stain a floor this way. However, after spending half a week on wall masking, cleaning and patching, it never struck me as excessive to take a few more hours to actually apply the stain.
We soon found that for straw, ground corncobs or plastic to leave a mark it must go down damp before our sprayed stain had soaked into the slab and be left undisturbed for the full four-hour cure time. On a very absorbent slab, my three-person crew would rush from one small section of floor to another, like hyperactive characters in a Charlie Chaplin movie.
Simulating textures
Above are some thumbnail images of our favorite simulated textures.
I love the remarkable effects possible with stamping and grinding, but the heavy equipment and lifting are beyond my strength. Many artists have a penchant for the accidental line and natural feel of scattered materials, since patterns found in nature are our main inspiration. Therefore, I still get my best materials from feed stores and thrift shops.
 I have not yet ventured into floor polishing, but am very impressed with the potential it offers to inlay a variety of natural and man-made objects. It is remarkable that soft inlays such as shells can be polished and flattened right alongside metal and glass. Carlos Perez, of Custom Concrete Designs in Florida, is doing some great work with inlays in polished floors (below and at right). I consider inlays to be simulated texture, since the floor is still left flat and easy to clean.
Admiring outcomes
I am envious of countertop artisans who have the opportunity to use translucent concrete and fiber optics, such as Jeff Kudrick of JM Lifestyles. The company won three awards in the American Institute of Building Design’s residential design competition in 2013 in the decorative concrete category, one for this countertop in a basement which netted a second place (below). He won first place in Residential New or Renovation for this handsome shower lined with primarily flat, simulated walnut paneling, a real tour de force of visual texturing (at right).
Whether you decide to play with actual textures or illusory ones, the flow of small details within the larger composition of your slab will add the equivalent of what painters call “expressive brushwork.” The goal is to get a second and third look from your viewers.
 I think it’s an awful shame to saw cut an integrally colored slab of concrete into tiny squares and laboriously grout them all, just so the owner can say, “See, it looks just like tile!” What is the point of imitating a cheap and commonplace product when they might have had a floor which looks like huge slabs of expressive and varied stone?
A few years ago we used all our skills to stain the home of a woman in Santa Fe who collects silk Persian carpets. I adore Persian carpets and would be thrilled to own just one. As she handed me the check she said, “I’m going to put most of my carpets into storage, so I can enjoy the wonderful patterns you made on my floors.” Wow, the rewards don’t get any better than that!
