 No one wants or likes a callback. Getting it right the first time around is the goal of every installer, no matter the job size or scope. But, as most of us in or around this industry know all too well, there are always going to be problems, questions or concerns. We all live and work in an imperfect world, and no matter how many years you have been at it and how detail-oriented you are, there are just too many variables that exist in this line of work to avoid the occasional issue. Add in the artistic side of the business, and the potential for unrealistic expectations and disagreement grows exponentially.
When you think about it, the relatively low percentage of callbacks and problems compared to the overall amount of work performed says a lot about the caliber of installers and the industry as a whole. But unfortunately there always will be problems, so it is better to be prepared and know how to deal with them once they do come knocking instead of standing there flat-footed with that deer-in-the-headlights look on your face. So, with that in mind, let’s get specific and look at some common problems with stained and dyed concrete and the remedies to those problems. These are the most common complaints when dealing with concrete stains and dyes, based on questions and emails I have received over the last 10 years.
The wrong color
Even though stained and dyed concrete is advertised as a flooring system with color variations and a marbled finish as part of the “beauty” that makes each project unique, the calls and emails still come in complaining about the wrong color. Often the final color is too dark or a shade to the left or right of what was desired. It’s wrong enough to warrant the question, “What now?”
It all depends on if it has been sealed or not. If it has not been sealed, and there is any doubt that the color is wrong, don’t seal it, or at a minimum, only seal a small area to see what it will look like. Depending on the type of sealer, type of stain, and the concrete, the color difference before and after sealing can be significant. I have seen acid-stained floors go from almost faint tan and gray before sealing to a brilliant, deep, rich brown after a solvent-based sealer was applied.
If sealing does not resolve the color issue, the fix involves either restaining or pulling stain out of the concrete. Restaining works best if you need to go darker or fill in light spots, but does not work very well when you’re trying to lighten the overall color.
If the desire is to lighten the color, the best results I have seen come from pulling some of the initial stain out of the concrete. By using the carrier on which the stain is based (water, acidic water, acetone, alcohol, etc.), you can usually pull some or all of the color back out. You may need to scrub or use a wet/dry vacuum to help get the color up and out of the floor.
In cases where the stain has a binder such as acrylic or epoxy, you may need to use a stripper to remove the initial coat. You may also be able to go right over the first coat with something if the final look is opaque.
If the floor was sealed and all parties agree that the color is not correct, your options are usually limited to stripping the sealer off to get access to the stain. In some cases, I have seen a tinted sealer used to help hide or mask stain issues. Keep in mind that this is not a good long-term solution, as color now resides in the sealer and will go away as the sealer wears.
Surface contamination
Stubborn stains, such as oil, wine or pet urine, that were not visible until after you stained or sealed your floor are another common issue. This one is pretty straightforward when it comes to corrective action. You need to be able to get at the stain to remove it. This requires the sealer to come off if it is present, and the use of the proper cleaning chemicals to affect the type of stain being removed.
A quick trick that I have found helpful is to spray the concrete with water prior to staining. While many stains are invisible when the concrete is dry, they can’t hide when wet. The water test at last gives you a chance to treat any contamination before you have a stain or sealer applied.
Sealer failure
What should you do when the sealer starts to fail or wear off a stained surface? Depending on if the stain has been affected, the fix can be as simple as a soap-and-water wash, clean-water rinse, and reseal. If the stain has been damaged, restaining or touching up the area with tints or color washes may do the trick.
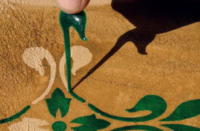
A trick I learned from a contractor years ago that works well in small spots is to use spray paint. Pick a color of paint that closely matches the stain color, hold the can about 12 inches to 24 inches off the floor and give the area a few quick sprays. The paint hides spots very nicely, and most spray paints bond very well to most surfaces — as graffiti artists have proven over the years. No matter the method you choose to repair the color, clean any excess off the surface and reseal.
Tape lines and tape pull
Tape glue is a lesser-known issue but one that comes up quite often. It is a not-so-well-known fact that the glue in most tape is soft and fluid enough that if the tape is applied to concrete the glue will migrate into the pores of the concrete. After you remove the tape the concrete looks fine — until you apply the stain. The glue acts like a barrier, and you end up with a nice clean line of blotch right where the tape had been. A solvent and lots of scrubbing or blotting is about the only way to get that glue residue out of the concrete.
On the flip side, tape also forms an unbelievably strong chemical bond with certain sealers, in particular acrylic-based ones. I have seen these bonds strong enough that when the tape is removed, the sealer, stain and top layer of concrete come with it. Depending on how deep the tape pull is, using the previously mentioned color touch-up method may save the job, or you may have to grind and recoat the entire surface with a microtopping. To be safe, or until someone comes up with a concrete-safe tape, I recommend not applying any tape to concrete that is scheduled to be stained or has been sealed.
The cheapest insurance
Finally, I would be remiss if I did not mention a good way to avoid being a victim of any type of callback on a stain project: Samples! The cheapest form of insurance on the job is a sample or mock-up done on the actual floor being stained. Identify an inconspicuous location or a place where furniture or carpet will later be placed and lay down some samples. Apply the samples the same exact way you plan on doing the actual job, including the sealer and wax. This sample or mock-up is not only cheap insurance, but can save you some significant time, money and headaches if the client starts complaining, assuming the mock-up and actual project do match each other.
When it comes to fixing stain issues, always test the fixes in an inconspicuous place too. And learn from your mistakes.


