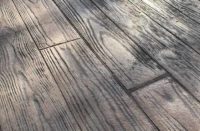
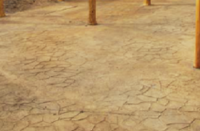
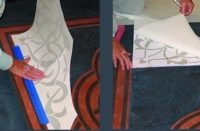
Q:I often have problems getting a stencil to lay flat on the concrete and stick to it as well. (especially when the concrete has been imprinted with a rough texture!) Then when the stencil is sandblasted, the definition in the stencil isn’t evident. Do you have any ideas?
A:A tip you might try is to borrow your wife’s blow dryer (after she is finished with it, of course). Once the stencil has been applied to the surface of the concrete, warm the stencil using the blow dryer. As the stencil is heated ittends to conform more readily to the rougher textures. The adhesive on the stencil itself will usually work fine. If it still is not bonding that well try using a can of the 3M Hi-Strength 90 spray adhesive. Along with a cardboard shield you can quickly roll back the stencil, spray the areas that have problems laying flat and then lay it back down. (Note: With the neat little adjustable nozzle, holding the can 6 to 7 inches from the surface provides a spray fan that’s approximately 2 inches wide. This eliminates a lot of unnecessary over-spray.) Lay your stencil back down and press the stencil firmly to the surface by hand or with a dry painters roller The adhesive is totally dry in 3 to 5 minutes.
 Q:In the mountains, there is a growing demand for colored concrete driveways. Is integral coloring the way to go since these driveways get driven on by snowplows with studded tires or snow chains?
A: No. Concrete at higher elevations is exposed to higher levels of Ultra Violet, Integral color fades over time unless a UV resistant sealer is applied as a maintenance procedure. Scrapes, or scratches are difficult at best, to repair and if they are successfully color matched, they don’t hold up long in extreme freeze-thaw climates. The positive aspects to an integrally colored driveway is namely cost and the owner typically won’t hold the same expectations as they would with a more expensive installation.
Stamped concrete driveways that are color hardened are easily repaired. Using the hardener (mixed with water and a bonding agent) to fill gouges or scratches, camouflaging the raw color by dusting on some of the release agent, and using a spray application for sealer, you can make the concrete look like new again. Color hardened concrete also seems more impervious to UV at high altitudes.
Q:Got any solutions for that slippery stamped concrete?
A: Ten or so years ago, new to the decorative concrete industry, I did a nice little job on a golf course. Nothing too fancy. The owners wanted to dress up the first tee, add some concrete and landscaping rather than a asphalt cart path. Sounded like a great idea. I presented them with some options and they settled on exposed aggregate borders, 16” wide around the perimeter of an inlay of a brick stamp. Of course I gave them a great price for the
job, you know the sort… cost plus a sign telling the whole golfing community who did the work. (Or who was getting worked.) When the job was completed, I was proud as punch. Perfect exposed Aggregate, not one blow out, not one pebble missing and the same results with my stamp work. Or so I thought.
A few days later, my phone rings, it’s the owner of the golf course, at least I think it’s him. His voice sounds different at the decibel range he is using. Something about two old duffers slipping on my concrete, jackhammers, and something about my contractors license number! This guy must have got up on the wrong side of the bed. Yesterday he was gushing over the wonderful job we had done.
Today, there are products that help address the issue of slippery concrete. Nonslip additives in sealers which are great for certain installations, commercial interior stain jobs, etc. What about concrete surfaces that get a lot of wear, vehicle and foot traffic, snow and ice on steep driveways or pathways, etc.? Since sealers wear down over time it’s only proper to get nervous about some golfer’s cleats greeting your hind-side!
Not long after the afore mentioned project I began using color hardeners to create a nonslip surface. Once the concrete was placed, colored and ready to stamp, I broadcast another fine coat of the same hardener, or a complimentary accent color to the surface to be stamped. What I found was that not only did the surface have much better traction, the stone I was simulating was even more realistic because of the rougher surface. After monitoring these types of installations, I have found that even in the harshest climates, — like Vail, Colorado — the “grit” or hardener that was added just before stamping held up.
