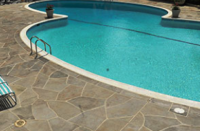
Behind every successful slab of stamped concrete is an accumulation of effort by you (the decorative concrete artist) and your local ready-mix provider. If one participant falls short the project becomes compromised, maybe not to the point of being unsalvageable but still to where it does not meet the goal of most professionals.
As I work on my third decade in the decorative concrete profession it becomes clear that the secret to stamping concrete is consistency — from concrete placement to imprinting, from coloring to the last coat of sealer.
Within the concrete stamping process, there are three issues that ultimately lead to a less than consistent installation, and all three are worthy of the time and space of this issue’s column.
Concrete mix design and placement
The most common thing a pour crew says upon introduction to a new ready-mix driver is, “Run a little out so I can take a look.” The placement crew relies on what runs down the chute to be the primary component of a day’s effort to create a lasting example of their decorative ability. However, far too many stamp projects start off doomed by concrete that is overly wet, too dry, or mixed with an inappropriate admixture that further complicates the already complex task of stamping concrete.
This scenario plays out time and again. The contractor is unorganized or chooses to deal with an unorganized ready-mix supplier. Or, someone is not willing to pay a few dollars more per yard for the right supplier or concrete mix. Leaving something as important as the ready-mix ratio to chance is not an option, not if the goal is consistency.
There are three steps each concrete stamping professional should take long before one rock rolls down the chute.
Identify the best mix for stamping, not the easiest to work with but the best. Stress to the supplier the importance of ready-mix consistency as it relates to the stamping process.
Establish a slump that requires a pour crew to add less than 1 gallon of water per yard on-site, if any at all.
Negotiate the best pour time according to weather conditions, traffic, overtime and so on.
Coloring
The days of tossing water-soluble bags of color into a mixing drum are over. Most reputable concrete suppliers now offer liquid coloring that is monitored and controlled by computer. I’m not much on integral coloring, but I will admit that liquid coloring has greatly improved the decorative concrete world.
Regardless of the coloring method, dry-shake coloring or integral, color consistency is another key component in transforming something ordinary into something extraordinary. Both coloring options have their individual benefits and drawbacks, so find a method that works best for your crew and stick with it.
If broadcasting color hardener is your coloring choice, please remember it is not necessary to completely cover the entire surface. Far too many stamp crews take precious time recoloring when they should be imprinting instead. It is more important to keep the coloring consistent then to achieve complete coverage. This is especially important on jobs that require multiple pour days.
If your crew struggles with the color hardener process, try switching to another manufacturer to see if this helps.
The coloring process most commonly requires a secondary release color. This accenting agent is not meant to penetrate the surface but will provide an antiquing effect and, more importantly, provide a permeation layer between the stamp tools and the semiwet concrete surface. For consistency, try to use a release color only slightly darker than the troweled-in base color. Too dark of a release choice will leave the surface spotted with release splashes. This spotting will not be visible until it’s too late to correct.

Here are some other tips:
- Always aerate the release powder before applying, because the powder will have compacted during shipping.
- If possible, use a yard blower to remove the release powder soon after stamping, to judge the consistency of the imprinting.
- Try a liquid release if imprinting consistency remains a problem. (Remember, all stamped concrete looks good until release powder is removed.)
The stamping process
The concrete itself will dictate the starting point, direction and pressure necessary to imprint the concrete’s surface.
Texture stamps are more forgiving than interlocking patterns. Interlocking stamping requires more planning before the stamping process begins. The first row of stamp tool placements is the key to providing alignment with your surroundings. Texture mat stamping requires no preplanned alignment or course of travel.
Begin the concrete stamping process as soon as the surface will hold the stamper’s weight. Remember, the stamping window can be short, depending on humidity levels, so an early walk-on start is vital to overall consistency.
Far too many stamping crews try to overdetail grout joints, wasting precious minutes. I recommend stamping the entire surface first, knowing the stamp tools can be carefully re-placed onto the surface afterward, allowing a more relaxed state of grout joint detailing.
A few more tips:
- The best opportunity for stamping consistency is when the same individual, or team, imprints the entire project.
- Spray-on surface retardants work well on hot windy days to maintain moisture within the concrete’s surface.
- Don’t allow visitors or incoming calls to distract your team when it’s time to imprint.
- Have one person working edges who is also available to assist the individual or team imprinting.
