Novice stampers are prone to making a few common mistakes. Some have to do with planning the job. Others have to do with misunderstanding the materials, while still others are simply a lack of familiarity with manipulating stamps and skins. Here’s an opportunity to learn the easy way. Here is a list of nine concrete stamping mistakes to avoid.
Begin with the basics
Tim Frazier, head trainer at The Stamp Store in Oklahoma City, says stampers need a command of the fundamentals of slab design before they start stamping. “Is it going to be indoor or outdoor use? Will it be driven on or walked on?” he says, of important questions to ask before starting out. “Does it require a vapor barrier, and did you put the correct amount of sand on the vapor barrier so the water can evaporate in all directions? Do you have a quality mix, matching the psi and the thickness with what kind of work is being done on it?”
The fewer variables influencing your job, the better. For a predictable mix on slabs he’ll be stamping, Ron Heck of Ron Heck Construction in Indianapolis uses only limestone aggregate, not pea gravel or other rock. Because it’s uniform and doesn’t absorb water, the more expensive material is worth it.
Communicate with the customer
Watch out for overselling. No stamping job is perfect, and Steve Harriman of Harriman’s Bomanite in Spencer, Indiana, says he doesn’t push to sell the product. Instead, he lets customers make the decision. Going hand-in-hand with that, though, is encouraging customers to be well-informed.
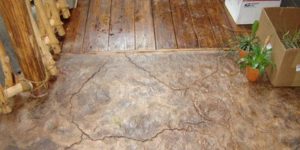
“You have to have a good, frank discussion with them about what they’re going to get,” he says. “They’re not going to get a flawless piece of work. There might be some cracks. There might be some imperfections. And they need to know that upfront, so they’re not going to be surprised at the end when they see some things that aren’t perfect.”
Once customers have picked out colors and patterns, bring them 2-by-2-feet samples, and don’t bring just one, Harriman suggests. “Bring one that the customer thinks they want, one you’d like to see them do, and slight variations on what they want, maybe one darker and one lighter.”
If a customer wants something that’s a bad idea in your climate, don’t be afraid to say no, says Heck. In his area, which is prone to many freeze-thaw cycles, he won’t do overlays.

Don’t create slippery surfaces
When you’re designing the job, make sure you’re not creating slippery slopes, Harriman says. “We’re tearing out a slab that is too slick, and the people couldn’t walk on it,” he says. “The slopes were too strong, and when it got moisture on it, the people were falling.”
To avoid creating a slip hazard, you may need to design a sloping path with steps or a new contour. But the surface needs enough slope for good drainage, so that algae and moss won’t thrive. Good drainage requires at least 3/16 inch per foot on a textured surface.
The choice of a pattern also affects traction. “You don’t want to have anything that doesn’t have much relief to begin with, because by the time you put the sealer on, it will be too slick,” Harriman says.
When it’s time to seal the concrete, a penetrating, water-based sealer creates a less-slippery surface than an acrylic coating does, Harriman says. But in the shade, that porous surface also harbors moss and algae, which can make the surface slippery. Harriman suggests adding a slip-resistant additive, such as H&C SharkGrip from Sherwin-Williams, to a coating.
Don’t overpour
Trying to pour a slab that’s too big to handle at one time is a common beginner’s error, says Heck. “I have a crew of four guys plus myself,” he says. “Yesterday we poured 6 1/2 yards of concrete, about 440 square feet. You want to max yourself out at no more than 7 yards at a time.” Heck says when a crew is stamping a very large slab, the stamping may start off looking good, but by the end it’s difficult to get an impression.
“Don’t pour more than you can handle and have plenty of help,” says Harriman. “Weather plays a huge part in how much you’re able to do. On a decent weather day, maybe 75 degrees, if you pour in the morning, if you have a complicated pattern, you might be able to do 400 to 500 square feet. If it’s going to be hot, you might have to reduce it to 300 to 400. That’s a hard lesson to learn.”

Don’t go near the water
Another newbie error is adding water to colored concrete in the truck to try to extend the working time. “Don’t tell the driver to give it 2 or 3 gallons to make it a little bit wetter, because there will be a color difference,” Heck says. “Once you start pouring, add no water to your concrete.”
Instead, he says, use admixtures, which don’t change the color. “They have these packets called Mini Delayed Sets,” he says. “One packet at 70 degrees Fahrenheit buys you 30 minutes of time. Once I’ve got five yards down, I give the driver these packets and have him throw them in the truck.”
On dry, windy days, Heck uses a spray-on surface retarder to avoid shrinkage cracks that can appear after a linked mat is tamped. When he does get shrinkage cracks, he rolls them closed with a paint roller dipped in release. Pay attention to those cracks because water can get into them and freeze.
Don’t stamp over release too soon
Heck describes a problem related to overpouring. “So often, subs, when they throw a colored release down, are stamping too soon. They’re impacting the release into the concrete. When you come back the following day to wash off the release on the area that was softer, the release is actually impacted into the concrete, and you can’t pull it up.”
The result is more release embedded in the surface where you started the job, less where you finished and a non-uniform color over the slab.
If you need to pour a big slab in one go, use texture skins instead of linked stamps, says Heck. “I tell my clients, you can pour more concrete at one given time using a texture skin because there’s no method to placing them,” he says. “I might be able to get away with 8 yards with a texture skin pattern, versus no more than about 6 with the linked patterns.”
Heck uses Shoe-In Texture Shoes from Butterfield Color to get out on the slab a little earlier. “Whenever we do texture skins, the stamp isn’t as thick as your linked pattern stamps, so I use texture shoes, which are like snowshoes, instead of our work boots. It disperses your body weight so you don’t create birdbaths where your feet are. It lets you get out there earlier.”
Another way to start texturing early is to put down plywood or Masonite to walk on, suggests Frazier of The Stamp Store.

Use a light hand with release
Heck says some contractors leave too much colored release on the surface. He doesn’t like that for two reasons.
The first reason is aesthetic. After removing the release, “I like to see only 20 (percent) to 25 percent of release over the whole project,” he says. “You want to see the primary color; you don’t want to see 30 percent of primary and 70 percent of release.”
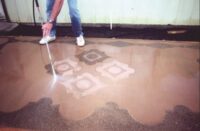
The second reason is practical. Release contains fatty, waxy materials that prevent sealers from adhering. Washing off excess release with a pressure washer isn’t enough. Heck sprays the surface with a 1:15 mix of muriatic acid and water to get the color the way he likes it. It also allows the sealer to adhere.
Timing and positioning are important
Making a preliminary layout and making sure everyone on the crew understands how the stamps go together will help the crew apply stamps correctly, Frazier says.
When is it time to stamp? “If you have high winds or sun, it can mislead you because the surface dries out faster,” Frazier says. “But, in general, when you can touch the concrete and not have any sand on your hand, it’s about time, when that laitance is crusted enough, to put a release agent on there. Generally, it’s within an hour or two.”
Frazier recommends getting enough stamps to cover at least the width of the slab.
Stamping too early and tamping around the edges of linked mats produces “squeeze,” the sharp little fins between the patterned areas that are the calling card of inexperienced stampers. “You’re popping the paste off down to the aggregate, so a texture wheel can’t address that adequately,” says Heck. “You look at so many jobs that you can see the stamp seam lines in them. So many people will bring a grinder the next day and grind those seams down,. By doing this, though, you lose the surface color,” he says.
When using texture skins, inexperienced stampers move the skin after they put it down, creating a blurred double imprint. Maybe they don’t bottom out the pattern on the skin, leaving a vague image. Or maybe they fail to give the stamps a quarter turn before moving them to the next spot. This can create a repeating pattern. Or they don’t overlap them by the recommended 6 inches, Frazier says.

Don’t overseal
Finally, don’t assume customers know how to maintain your concrete. “People put too much sealer on,” Harriman says. “They think they need to do it every year. That’s a huge mistake because after four or five years, the concrete is not able to breathe anymore and that creates clouding issues.”
Harriman tells his customers they’ll need sealer every two to three or three to four years. “But when you think it’s ready for sealer, do it next year because you want that previous sealer to be pretty well gone.”
In fact, he recommends his customers call him when they think it’s time to seal, so he can look at the slab and tell them if it’s necessary.
Questions from Readers
Question
Can primary color be added to a sealant to polish? Additionally, can oxide pigment be used to replace color hardener?
Answer from Concrete Decor
Attempting to add color to a sealer on already polished concrete surfaces isn’t a good idea. Coloring concrete during the polishing process generally is achieved with integral coloring at the time concrete is installed or with colored aggregates. You can also use dyes to color the slab during the polishing process. Normally, you can accomplish this at or just before the 200-grit polishing step.
With regards to using iron oxide pigment in place of a color hardener, the answer is no. Iron oxide pigments by themselves won’t broadcast properly and will oversaturate the concrete surface with color. Oversaturation will weaken the concrete surface. A color hardener works best because it adds more cement and fine sands along with the color. This actually helps to increase surface hardness.
Question
Can I just use a colored release agent which is about the same color as existing concrete around the slab I’m going to pour? Or does the job require color hardener? It is only subject to foot traffic. Additionally, I’m filling a 48-square-foot pit where a raised brick planter sat on a courtyard.
Answer from Concrete Decor
You can’t use color release in place of color hardener. Color release is hydrophobic which helps to impart surface color while also keeping the stamping or texturing tools from sticking to wet concrete. On the other hand, color hardener includes iron oxide pigments, cement and sands that naturally fortify the surface of a new concrete installation.
