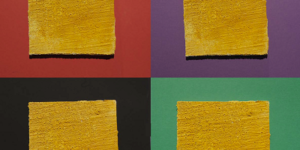
I feel the industry has created a very busy design world. Many times I think people do too much design and they need to simplify things. Many interior designers want simple stain-and-seal floors because they want to focus on the furniture, lights and wall decor.
So often I see contractors who only present complicated designs to their clients and never show them how to look at the project in a simpler way. The easiest way to look at it is the smaller the room, the smaller the pattern. The larger the room, the larger the pattern. If you have a 2-foot pattern in a 1,000-square-foot room, it’ll be extremely busy. If you make a 4-foot tile pattern on a 200-square-foot floor, there will barely be a pattern.
First up, the basics
How do you determine the layout for an individual tile pattern? How do you find center? How large should the tile pattern be and why? How large should the border be and why? Do you need a border?
Typically, I like to chalk out the border before I do anything else. It makes all the other measurements easier. I usually make a border between 6 and 10 inches wide. Under 6 is way too small and most machines can’t cut any closer to the wall. More than 12 inches starts to make the room look smaller. Like everything else I’ll talk about, it’s all relative to the size of the room.
Let’s start with how to find center. Most concrete contractors find the center by chalking two lines from corner to corner and making a big X through the space. I think this is a waste of time and chalk as I’ve never seen a slab that’s a perfect square. They’re always rectangular. By chalking these two lines you might find center but if you cut or use those lines to draw off you’ll never create a true square tile pattern. Instead you’d be creating a diamond pattern. However, diamonds usually have more angle than those lines.
Simple measurements
Instead I make three simple measurements, always with soapstone. Choosing either the length or width of a room, I measure twice from wall to wall and mark the middle of each measurement with a small dash, making sure the dashes are within 6 feet of each other. Then I measure once through those two points to find the true center. After I have those three marks, I place a straight edge across all three, preferably a 6-foot straight edge. I place the straight edge’s 36-inch mark on the center point.
 Next we need to determine the size of the tile. Once I decide on a 2-, 3- or 4-foot tile pattern I need to figure out the center of the chosen size. By center, I mean the diagonal from corner to corner. You figure this out two ways. For most of us, one is way harder than the other.
The harder way is to calculate A2+B2=C2 and you have to find C. So if it’s a 2-foot tile then it is 24 inches squared plus 24 inches squared and then you take the square root of the answer which turns out to be 34 inches. Luckily we can now download an app to help us out with that. If I lost you, there is an easier way.
Usually I already have a border laid out. All you have to do is mark a 2-foot line somewhere. For simplicity, let’s pick a corner of the room and check to see if it’s square and then measure both directions off the corner. I make a small mark that I can erase afterwards and measure the distance of the diagonal. Then I measure the distance between the two. You don’t need to draw the line, just measure the distance of the diagonal and you’ll get the same measurement of 34 inches.
Keep everything square
Now, go back to your three points at center and lay your straight edge down with 36 inches at center. (I use a 6-foot square and 36 inches is the center.) Half of 34 is 17. Measure 17 inches in both directions from 36 and make a small mark. Take a square and measure 17 inches from 36 with it. You’ll have three points of the center tile that you need.

Next chalk through those points and start the first two lines of your tile pattern. Do not measure four points at the center. There is a specific reason for that. Many times I have seen my employees try this and they always fail. The goal is to find the center and make a square tile pattern. You only need three points to accomplish this. The fourth point isn’t needed and can mess up being square.

Once you chalk those two lines, check to make sure they are square. If they are, you can now measure 2 feet off each line and slowly make a 2-foot tile pattern. Make sure to mark each dash for each line as close to the outside of the room as possible, preferably on the border. The farther away each dash is the more accurate your design will be.
The goal when creating a basic tile pattern is to keep everything square. Constantly measuring from the center of the room does not make things square. I challenge all of you to take a 6-foot straight edge and try to draw two straight lines that are 15-feet long and 2-feet apart without using a chalk line. I promise you when you’re done, they won’t be exactly 2 foot off each other or square to everything else you are chalking out.

Although we perceive the straight edge to be perfectly setup along a straight line it can be slightly off. Being slightly off numerous times takes everything out of square. The next article is going to discuss that point in a lot more detail as I break down how to draw an ashlar slate, or mixed/matched, tile pattern.
Video Tutorial


