Concrete countertops are a very hot item these days. Fabricating them can be much easier than you think — when you use the right tools and technique. This is the key to eliminating frustration and ultimately producing a quality product. However, I have found that many of the tools concrete countertop fabricators are getting locally or via the Internet are not designed for use on concrete.
I have extensively tested all varieties of tooling in the last three years. I have been able to determine which tools actually work well and which tools should stay in the granite world. Using the wrong tools for concrete polishing can adversely affect the quality of the countertops you produce.
Precast polishing
The tools I recommend for precast polishing are the Makita PW5001C 4-inch Electronic Wet Stone Polisher. I also recommend the 5-inch Ultra Speed Pads, 5-inch Alpha Rigid Backer Pad, 5-inch Alpha Flexible Backer Pad, and an apron. Don’t overlook the apron. You will get wet! Polishing pads come in a series of grits that are as follows: 50, 100, 200, 400, 800, 1,500 and 3,000. If you are looking for the exposed aggregate look, I recommend using 5-inch Ultra Speed polishing pads starting at a 50 grit. If you are just polishing the cream, you will start with a 400 grit (and go very lightly). You will then work your way through the different grits until the desired look has been achieved. On some mixes, 1,500 grit will be the last pad that you will use, although other mixes will still continue to polish at a 3,000 grit.
Pads from 50 grit to 400 grit are actually grinding and removing material in preparation for the polishing stages. It is more cost-effective and safer (because of the dust) to do these stages wet. You are removing material and working the pads very hard at this point, and if there is no water to cool the pads’ resin, it turns soft and releases the diamonds. The 800 to 3,000 grits are where the magic happens. If you are looking for a nice polish with a smooth feel, use the ultra-speed pads for your top grits.
If you’re going for a super-high sheen, then running your 800-plus grit dry will pop a shine that many didn’t realize was achievable. At this point, the pads will not be removing any material, so you will see little to no dust at all. The hot pressed pads are by far the best dry pad for an ultra-high shine.
Poured-in-place polishing
It is easier and more cost-effective to build precast concrete countertops, but occasionally, you or your customer will insist on having no seams at all and a poured-in-place application will be necessary. This is the only situation where I would recommend polishing dry all the way through your polishing steps. It wouldn’t be a bad idea to charge a little more to make up for additional tool wear and added headaches.
To do this, you will need the Makita 9565CV 5-inch Angle Grinder. You will also need 5-inch hot pressed pads, a Pearl Vacu-Guard, and a 5-inch aluminum backer pad. Once again, you will need to decide whether you will be exposing aggregate or polishing the cream on top. You use the same grits used for wet polishing that you use for dry. However, you do not use the same polishing pads. When polishing dry, the hot pressed pads will be used all the way through the different stages of grits.
Now that we have the correct tooling covered, here are some tips and tricks to make your project look its best.
Surface polishing
The key to flat polishing is keeping the head of your polisher flat and level with your slab top. Every time you tilt or dip your grinder, swirl marks could follow. I would recommend using a rigid backer pad for this. This is because a flexible backer will allow your polishing pad to bend on the edges. Also keep in mind that while the polisher has a handle, you don’t have to use it. Try putting one hand on the head of the polisher. This will keep the weight in the middle of the pad instead of off to one side.
Five-inch pads are better for top polishing than 4-inch pads. I know that this size difference is minimal. However, it helps a lot to go with a 5-inch pad because they give you a bigger base. It also doesn’t hurt that they cover more surface area. Even though there is only a 1-inch difference in diameter, you will finish quicker.
It depends on how much money you want to spend on tooling. However, if your budget will allow it, definitely look into the DS3011 Planetary Polisher from Inter-Tool. It’s one of those machines where, after you use it, you will ask yourself, “How did I ever do this before?”
The DS3011 will cover 12 inches in one pass instead of the 4 or 5 inches that you would cover with a single-headed unit. And any problems with swirl marks go away. This is because the machine has three points of contact making it almost impossible to not be flat on the surface.
Edge polishing
Often when I tell customers that they can polish their edges with a handheld polisher they find it hard to believe. Think about it — granite fabricators polish edges all day, every day, with the same polishers. Sure, it is a bit harder to learn. However, once mastered, you will be polishing your edges in a fraction of the time that it took you to do it with hand pads. Lose the hand pads for edge polishing!
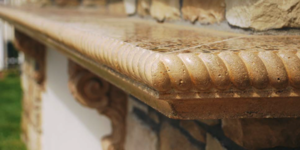
If you have a radius edge that you want to polish, try a flexible backer pad. Just a little bit of flex in the backer will bend around your radius. This will eliminate lines that can occur from using a rigid backer. That said, using a rigid backer on the flat edge will help you to stay flat the same way that it does when top polishing. For example, if you are attempting to polish a standard 3/8-inch round over, use a rigid backer on the flat edge underneath your round and a flexible backer for the actual radius. Move your polisher left and right across your edge. Do not roll it up and down — this will make your edge wavy.
This information should be a useful guide on correct tooling and techniques. However, this is 101-level instruction to concrete countertop polishing. I highly recommend attending one of the many informative seminars that are available from companies such as Concrete Countertop Institute, Cheng Design, Buddy Rhodes Studio, Decosup, and Brickform. Just like with anything else, there are tricks of the trade. Having someone teach you these things firsthand can eliminate a lot of wasted time and money.
Most importantly, concrete countertop fabricators must always strive for perfection. Countertops differ from most concrete work that you do on a larger scale. We are talking about a much smaller area that is in the most important room of any house and a lot closer to eye level. If you wouldn’t put the countertops in your own home, then your job isn’t done. The only thing that will limit you in concrete countertops is your imagination. Keep an open mind and don’t be afraid to try something new.
www.concretecountertopspecialties.com


