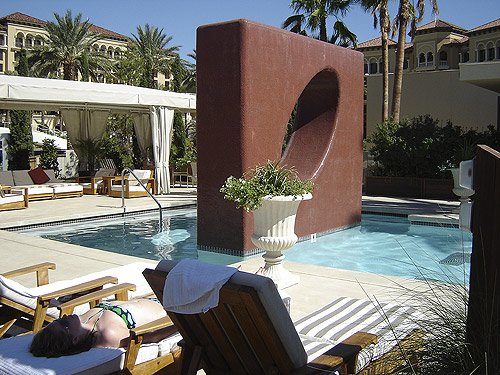
Using a broad palette of colors, textures and patterns, concrete artisans have simulated many types of building materials. Now, by using pressure-applied, those same skills are being applied to 3D sturctures such as walls and ceilings.
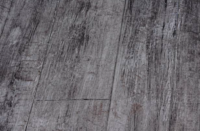
Over the years, skilled concrete artisans using a broad palette of colors, textures and patterns have produced a dizzying array of flatwork designs. Wood floors, brick pavers, and tiles made of stone, terra cotta and marble have all been successfully simulated.
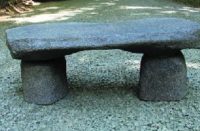
It is no wonder then, that the next logical step would be upward — to bring concrete artistry to walls, arches, three-dimensional structures, ceilings and other vertical structures. While the average homeowner or business owner may have trouble envisioning massive tree trunks, gigantic boulders and stone walls created out of concrete, pigment and dye, a growing segment of decorative concrete masters have expanded their palettes onto vertical surfaces.
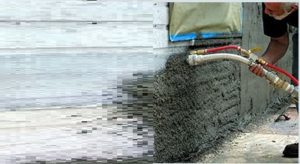
One method to bring concrete to vertical surfaces — as opposed to gluing premanufactured decorative items to existing substrates — is to spray concrete onto the surface with specialized concrete pumps.
While most within the concrete trade are familiar with gunite or shotcrete pumps for applications such as swimming pools, roadways and mine-shaft reinforcements, some are not aware that the pump has roots in decorative concrete.

In the early 1900s, taxidermy artist Carl Akeley devised a special gun that used compressed air to spray water and plaster onto a frame. According to historians at Allentown Equipment, a Pennsylvania manufacturing and supply company, this resulted in a strong, thin coating that would not slump off the frame, yet gave Akeley ample time to work his models before the material set up. Akeley called his apparatus the “cement gun,” which later gave way to the term “gunite.” Changes in the delivery system spawned a new name.
Shotcrete, as defined by the American Shotcrete Association, is now an all-inclusive term that describes the spraying of concrete or mortar through either a dry-mix or wet-mix process. Gunite refers only to the dry-mix process, according to ASA’s definition.
Mixing for the pump
Those already involved in decorative concrete who may be thinking about venturing into shotcrete as a way of working vertically should be aware of differences in product mixtures. Wayne Sellon, owner of Tajmawall, a decorative concrete firm specializing in vertical walls, explains that his firm goes lighter. “There’s a big difference between shooting heavy materials – roadways, mine shafts and such – and the stuff we’re using,” he says.
Shotcrete can be a heavy mix, 3/8-inch minus aggregate. The difference between a heavy mix and a lightweight wall mix is that the ones with lightweight aggregate don’t bounce when they hit the wall, Sellon states.

“I came from the plastering trade and shot all kinds of materials with all kinds of pumps,” says Sellon. “It’s not overspray, but the bounce of the heavier, harder aggregates that creates a mess. A soft aggregate hits like a spitball and sticks.”
When Sellon selects shotcrete mix — he even has his own formulation — he looks for several qualities, including length of cure (12 hours is great to allow time to stamp or carve the material into three-dimensional shapes), how it “stacks” (sticks to the wall without sagging), and whether it cures hard enough for the specified application.
Not hard to learn
While selection of proper material is crucial, proper prep and application can make or break the job. “The substrate must be prepared properly,” states a shotcrete FAQ page on the ASA Web site. “Proper placement is also important in achieving good results. Shotcrete success depends largely on the skill and actions of the nozzleman. Most defects can be attributed to poor shotcrete placement.”
 “The stuff’s not hard to learn, but easy to goof up,” says Johnny Hodge, an independent manufacturer who was formerly technical director for Southern Color, North America.
The dry material typically arrives at the job site in 50-pound or 60-pound bags. It can be pre-blended with coloring agents — most often natural or synthetic iron oxides — to ASTM C 979 standards, says Hodge. If blending on site, concrete decorators normally choose white shotcrete base for lighter colors and gray base for darker tones.
It’s important not to add too much color. According to the FAQ section of the Portland Cement Association Web site, contractors are typically encouraged to follow ASTM C 979 recommendations and use only the minimum amount of pigment required to achieve the desired color, which should never be more than 10 percent by mass of cement.
But this simple mathematical rule may give neophytes trouble, says Hodge. “Color packets typically come in one-pound to two-pound packs. While at a glance it may appear that you can add several color packs to a 50-pound or 60-pound bag of shotcrete mix and stay under the 10 percent mark, it’s important to remember that a 50-pound or 60-pound bag of shotcrete mix typically contains 25 percent to 35 percent concrete. … Base your additives on the amount of concrete, not bag weight.”
 In terms of mixing water, Hodge’s advice is to simply follow manufacturers’ instructions. “Excessive water is by far the biggest problem encountered,” he says. “Too much water can lead to excessive shrinkage, which may lead to cracks.”
Tweaking rarely needed
With modern mixes, concrete artists don’t often need to do much tweaking, says Sellon, who has perfected techniques that allow him to spray more than 2 inches thick and who also teaches concrete artistry in Temecula, Calif. “Don’t forget to add a little extra water to make up for dry color compounds you add in,” he says. “If you’re spraying in very cold country, you might add calcium chloride to the mix to keep the material warm inside – if concrete freezes while it’s curing, it may turn to sand. You can also use additives such as retardants to slow down the rate of cure.”
 Sellon agrees with Hodge that applying shotcrete is not hard to learn, but easy to goof up, especially at first. Hodge advises rookies to slow down — use multiple thin coats when building up thicknesses beyond 3/4-inch — and pay attention to manufacturer’s cure times.
“The big thing about shooting any type of material is the time it sits in the hose,” Sellon says. “If it remains in the hose for 20 or 25 minutes, depending upon the weather conditions, you need to run that mud back into the mixture, because if you don’t you’re going to end up eating your hose up.
“Just watch the basics,” he says.
