The world of decorative concrete has taken leaps and bounds in the last few decades. Men and women who began in the trenches have placed themselves into a realm of artistry with decorative concrete that’s as functional as it is breathtaking.
Every year new products emerge to better enhance the aesthetics as well as the integrity of these creations. For example, epoxies are no stranger to the industry — but lets talk about a sculpting epoxy for the theming industry.
In the world of theming, epoxy is still an underutilized tool for creating levels of detail and realism second to none. For example, Polygem Inc. has spent years developing its 307 series of epoxy among others that are custom-formulated for this exact type of work.
What’s unique about a sculptable epoxy? Primarily, it takes texture well and it can be flaked.
I have developed a system using epoxy that works well for me and defines my style. Other great artists in the field have done the same, which is what makes us all unique.
Being able to work with epoxy can ultimately give your clients a range of options they never knew they had.
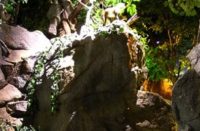
Here’s a step-by-step look at how I create roots, using sculptable epoxy to form the textured “bark.”
 1. The armatures on which I ultimately place the epoxy usually consist of rebar and concrete, PVC, urethane foam or a foam-fiberglass combination. Unless I need something lightweight for shipping, I generally use a rebar or pencil-rod armature with diamond-mesh lath. This can be welded or tied to create your shapes.
2.  Hard-coating gives me a solid surface on which to apply my epoxy. When hard-coating with concrete I like a smooth, sticky mix that I can apply with my gloves. Kirt Bag carving mix is one I can use to hard-coat and pre-shape the roots.
For a fallen tree (not shown here), I hard-coated with Froth-Pak spray foam with a 3.5 R-value per inch, then fiberglassed, to keep the weight down for shipping.
3. Polygem 307 FR Lite is mixed using the thickening filler and applied in workable batches. Under normal temperatures you will have a couple of hours to work it. The amount of thickener used depends on the types of textures you’re trying to create. I do much of the work with my hands, including “rotten wood” textures.
4.  Wood sticks and tools work best when manipulating the epoxy, because the wood holds water better and water is used as the release. My latex bark stamps are also dipped in water and shaken off before being pressed into the epoxy. My molds range in size from 3 inches to 3 feet. Various brushes are used to create grains and textures in the wood.
All of the inner or exposed wood such as broken ends I create by hand. Again, bark textures are created with the molds.
 5. Finer hair roots are made using Polygem’s EZ-Flex rubber and hemp rope. The rope is unraveled, tied with knots and coated with the rubber.
 After being coated, the roots are dipped in a mixture of dry sand with a bit of peat moss added.
 6. When all the epoxy work is done, it is colored using exterior flat house paint. (I like Valspar.) For bark, I like to base the tree out in a very dark brown and black using an airless sprayer, then bring my lighter colors out through dry-brushing, washing, and lastly spraying with a touch-up gun and an airbrush.
 7. I like using a “graffiti guard” coating lightly misted to create a flat finish on outdoor work. An antigraffiti sealer is the flattest finish there is.


