 Glad you could join us again. It’s Shotcrete Day in sunny California!
Dawn is just breaking as I arrive on site. Long before the residence comes into view, I see ready-mix concrete trucks down the block lining up in preparation for a big day.
I park on the street below the house and as I make my way to the project the two pumps are already lined up. Their crews are rolling out the hoses as the first truck moves into position.
Shotcrete Day is always a long one, even on smaller jobs, and this project is massive!
The pool features a beach entrance and a gentle slope that allows you to enjoy the view without tripping over steps.
When in the water, this amazing view of wine country remains unobstructed as the back of the pool consists of 60 feet of vanishing edge. With that edge of the pool removed, water spills over the entire length, flowing into a catch basin below. Pumps then return the water to the pool.
 At both ends of the vanishing edge, a rock fire-bowl is built into the coping. Boulders adorn the coping and create an umbrella holder in the pool’s shallow end. In the middle of the pool, stepping-stones allow access to a volcano spa surrounded by the vanishing edge. The deep end features a huge grotto with benches along the back and both sides.
The grotto also hosts a dry cave entrance that allows easy access to the large waterfall that cascades down the right side and functions as a staircase to the top of the grotto. About 7- or 8-feet high, the front of the top of the grotto offers a jumping point into the deep end.
 There’s enough space to sunbathe between that and a small wading pool in the back. Yes, this project is enormous!
As I put on my protective clothing and gather my tools, the concrete truck begins to pour our preferred wet-blend, shotcrete, into the pump. I prefer a wet-blend to a dry-blend for many reasons. One thing I really like about shotcrete is that it guarantees compressive strength at 4,500 psi.
 Strength is important because the shotcrete will form a monolithic foundation for the entire project, tying everything together. It’s also easier to work with. There’s far less material rebounding and any material that does fall or overspray is still useable. Also, it hardens enough so you can stand on it in about 45 minutes and allows more mud to be hung for shaping.
Finally, the nozzle itself is easier to handle. I’ve used shotcrete almost exclusively about the last 15 of my 23 years in the concrete business.
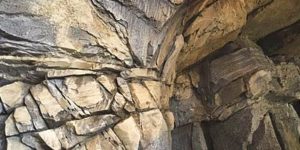
While work begins with shooting the pool, I inspect things one last time and make sure everything is tight. As the nozzle reaches the deep end, it shoots the inside of the grotto first. All steel must be covered by a minimum of 3 inches of mud, but more is applied to allow carving and rough shaping of the rockscape.
 I keep a couple of buckets of mud on the side to allow me to build up some areas even more, creating a lot of ins and outs to eliminate the feel of a flat wall and create movement. Next, work progressed to the large boulder on either side of the grotto; around the back, and to the dry cave entrance and waterfall.
Until after dusk and into the night, the nozzle bounced back and forth between my rockscape and the pool. Lights were brought in and work continued.
 It is essential to do this phase all in one day to avoid cold joints, so the top of the grotto wasn’t finished until after 8 p.m. It was an exhausting day but more than worth it knowing we have a rock-solid foundation upon which to build the rest of the project.
In my next installment, I’ll cover one of the most underrated phases of the project: waterproofing. Stay tuned!
Disclaimer: The statements and opinions expressed in this blog post are those of the author or authors and do not necessarily reflect the position or opinion of Concrete Decor magazine.


